
Side Dishes
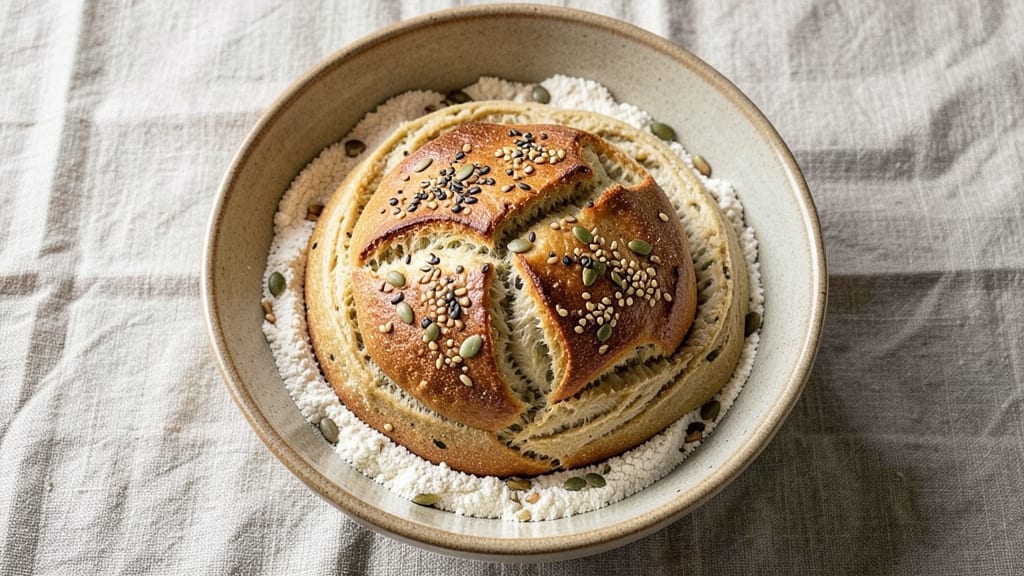
This artisan seed bread recipe delivers the perfect balance of rustic crust and nutty crunch, with a slow-fermented dough that develops deep flavor. The secret lies in combining whole grains with a mix of flax, sesame, and pumpkin seeds—not just for texture, but to create that signature open-crust finish.
I’ve baked this exact loaf for holiday tables and it never disappoints, transforming any meal into something special.
The process requires patience—overnight fermentation builds complexity while keeping the dough manageable, and a steam bath in the oven ensures that crispy, crackling crust.
You’ll need just five simple ingredients plus your seed selection, but the technique is what elevates it: shaping by hand for an irregular, artisanal look and scoring before baking to guide the oven spring. This isn’t your average sandwich bread; it’s a showstopper.
What you’ll end up with is a loaf that’s golden-brown on the outside, with a shatteringly crisp crust and a tender, airy crumb studded with seeds. The aroma alone—warm, nutty, and slightly sweet—will fill your kitchen, while the texture offers both chew and crunch in every bite.
Serve it fresh from the oven with butter melting into the cracks, or toast slices for breakfast the next morning.
For those with dietary needs, you can easily swap in whole-grain flour or gluten-free blends without sacrificing texture. The seeds remain the star, adding fiber, protein, and a satisfying bite that keeps everyone reaching for seconds. Ready to bake bread that feels like a labor of love? Let’s get started.
Ingredients for artisan seed bread
Eight simple ingredients transform into a loaf with golden crust and nutty crunch.
| Ingredient | Amount | Notes |
|---|---|---|
| Bread Flour 🌾 | 4 cups | High-protein for structure |
| Whole Wheat Flour 🌾 | 1 cup | For nutty depth |
| Flaxseeds 🌰 | ½ cup | Ground for binding |
| Sesame Seeds 🌱 | ⅓ cup | Toasted for crunch |
| Pumpkin Seeds 🎃 | ⅓ cup | Lightly roasted |
| Active Dry Yeast 🍞 | 2 tsp | Or 1 packet instant |
| Water 💧 | 1 ½ cups | Lukewarm, not hot |
| Olive Oil 🫒 | 2 tbsp | Extra-virgin preferred |
| Salt 🧂 | 1 ½ tsp | Fine sea salt |
| Maple Syrup 🍁 | 1 tbsp | For subtle sweetness |
| Apple Cider Vinegar 🍎 | 1 tbsp | For tangy flavor |
The flours are the foundation—King Arthur Bread Flour gives that signature open crumb, while whole wheat adds depth. Grab flaxseeds from the bulk section at Whole Foods or Trader Joe's for best freshness. Toast your seeds in a dry pan for 3-4 minutes until fragrant—this brings out their nutty flavor. The yeast should be fresh; if it's over a month old, toss it. For the water, lukewarm is key—too hot kills the yeast, too cold slows fermentation. I always use filtered water, but tap works too if you're unsure.
No sesame seeds? Sunflower seeds work in a pinch, though the flavor differs. Running low on flax? Chia seeds at double the amount bind just as well. The maple syrup can be swapped for agave nectar, but maple adds that caramel note that pairs perfectly with the seeds. If you're gluten-free, use a 1:1 blend like Bob's Red Mill GF Flour—just add an extra tablespoon of xanthan gum. The vinegar is non-negotiable though; it helps develop gluten and gives that slight tang that balances the sweetness.
This dough is a patient one—overnight fermentation in the fridge is ideal. Cover it tightly with plastic wrap to prevent a dry crust. The seeds keep for 3 months in an airtight container, while ground flax loses potency after 2 weeks. Once baked, the loaf stays fresh for 3-4 days at room temperature, wrapped in a towel. For longer storage, freeze slices wrapped in parchment—perfect for quick toast.
Why You'll Love This Recipe
- No-Knead Magic: I swear by this—just mix, let it rise, and bake. No stand mixer, no fancy tools, just a bowl and patience. The flaxseeds add a subtle nuttiness that makes it feel like you spent hours baking, even though you didn’t.
- Crunchy & Nutty Bite: That first crack of toast reveals sesame seeds popping and pumpkin seeds crunching—like a little flavor explosion. The whole wheat keeps it hearty, but the bread flour makes it light enough to eat for breakfast, lunch, or dinner.
- Meal Prep Hero: I bake two loaves on Sunday and it lasts me all week. Toast it, slice it for sandwiches, or pack it for lunch—it’s my go-to for busy mornings. The seeds stay crispy even after days in the freezer, which is basically a miracle.
- Budget-Friendly Staple: Flaxseeds and pumpkin seeds are cheap at bulk stores, and using both bread and whole wheat flour stretches my grocery budget. Plus, one loaf feeds my family for days, so I’m always covered without overspending.
Step-by-step instructions for artisan seed bread
Here's how to craft a rustic seed bread with a crisp crust and nutty heart—slow fermentation makes all the difference.
Mix the Dough and Begin Fermentation
In a large mixing bowl, combine the 4 cups bread flour and 1 cup whole wheat flour. Stir in the 0.5 cup ground flaxseeds, 0.33 cup sesame seeds, and 0.33 cup pumpkin seeds—set aside 2 tablespoons of the seeds for topping later. Make a well in the center and add the 2 teaspoons active dry yeast, 1.5 teaspoons salt, 1 tablespoon maple syrup, and 1 tablespoon apple cider vinegar. Pour in the 1.5 cups lukewarm water and 2 tablespoons olive oil, then mix with a wooden spoon until a shaggy dough forms.
Turn the dough onto a lightly floured surface and knead for 8-10 minutes until smooth and elastic. The dough should feel slightly tacky but not sticky—add a little more bread flour if needed. Place the dough in a lightly oiled bowl, cover with a damp towel, and let it rise at room temperature for 1 hour, or until doubled in size. This initial fermentation develops flavor and improves texture.
Cold Proof for Enhanced Flavor
After the dough has risen, transfer it to the refrigerator and let it cold-proof for 12-16 hours. This slow fermentation step deepens the bread's flavor and improves its structure. The dough will rise more gradually, creating a more open crumb and richer taste. I like to do this overnight—it’s hands-off and makes the bread even better.
Before shaping, remove the dough from the fridge and let it sit at room temperature for 30 minutes to relax. This makes handling easier and prevents the dough from tearing when you shape it. While the dough rests, preheat your oven to 425°F and place a Dutch oven with a lid in the oven to heat as well.
Shape and Score the Dough
Divide the dough into 8 equal portions (about 6 ounces each) and shape them into smooth, round boules. To do this, cup your hand over a piece of dough, gently press and pull the edges toward the center, and roll it on the counter to form a taut ball. Place the boules on a parchment-lined baking sheet, leaving space between them for expansion.
Brush the tops of the boules with a little water and sprinkle with the reserved 2 tablespoons sesame and pumpkin seeds. Use a sharp razor blade or knife to score the tops in a simple crosshatch pattern—this helps the bread expand evenly and gives it a professional look. The seeds will add a delightful crunch and nutty flavor to every bite.
Bake for a Crusty, Golden Loaf
Carefully transfer the baking sheet to the preheated Dutch oven (with lid) and bake for 20 minutes with the lid on. This steaming phase helps create a crisp crust and prevents the bread from drying out. After 20 minutes, remove the lid and continue baking for another 15-20 minutes until the bread is deep golden brown and sounds hollow when tapped on the bottom.
Let the bread cool on a wire rack for at least 30 minutes before slicing—this allows the crumb to set and makes for cleaner cuts. The bread should have a crisp, crackly crust with a soft, airy interior and pockets of nutty flavor from the seeds. Serve warm with butter or olive oil for the ultimate artisan experience.
Pro Tips For Making Artisan Seed Bread
- TOAST SEEDS FIRST: I learned this the hard way—raw seeds taste bland and muddy the dough. Toss flax, sesame, and pumpkin seeds in a dry skillet over medium heat for 2-3 minutes until they smell nutty and fragrant. Let them cool completely before mixing into the dough, or they’ll cook the butter and kill your rise.
- WEIGH YOUR FLOURS: Bread flour and whole wheat don’t pack the same. Scooping leads to inconsistent textures—one batch dense, the next airy. Use a kitchen scale for precise measurements (bread flour: 350g, whole wheat: 150g). If you’re eyeballing, at least fluff the flour first and scoop gently to avoid compacting.
- STOP KNEADING WHEN IT’S TOUGH: The dough should feel like a firm, slightly tacky playground ball—not sticky, not dry. Whole wheat fights gluten, so resist the urge to overwork it. If it’s still gummy after 8-10 minutes, add 1 tablespoon more bread flour. Over-kneading turns your bread into chewy shoe leather.
- USE COLD BUTTER: Cut that butter into cubes and freeze it for 10 minutes before mixing. Cold butter creates pockets of steam during baking, giving you that signature open crumb. If you melt it first, you’ll end up with a dense, cakey loaf—no matter how much you wish otherwise.
Essential equipment for this dish
Dutch Oven Essentials
A Dutch oven is the secret weapon for artisan seed bread—its heavy cast iron retains heat evenly and creates steam for that perfect crust. I swear by the Le Creuset 5.5-quart for its even heating and durable enamel coating, but Lodge Pre-Seasoned is a budget-friendly alternative that works beautifully.
Preheat the Dutch oven with its lid in the oven before baking to build steam and ensure a crispy crust. 🔥
Digital Thermometer
Precision matters when baking bread, especially with seeds that can burn easily. A Thermoworks ThermoPop is my go-to for checking dough temperature—aim for 78-80°F before shaping.
This ensures consistent fermentation and prevents overproofing. For the oven, I use an infrared thermometer to confirm 425°F accuracy, which is critical for that golden crust.
Bread lame or Razor
Scoring isn’t just decorative—it guides oven spring and prevents cracks. A baker’s lame (like the West Bend Lame) gives clean, professional cuts, but a sharp razor blade works in a pinch.
Dip it in water before scoring to prevent sticking, and use a crosshatch pattern for even expansion. This step makes all the difference in that artisanal look. ✨
Mixing Bowls and Scale
Start with a stainless steel mixing bowl (like OXO Good Grips) for easy cleanup, and use a digital kitchen scale (I love the Escali Primo) for precise measurements—especially with seeds.
Weighing ingredients by grams ensures consistency, especially when swapping flours or seeds. A damp towel keeps dough from drying out during fermentation, while a lightly oiled bowl prevents sticking during cold proofing.
Wire Rack and Parchment
Never skip the wire cooling rack—it’s non-negotiable for crisp crusts. I use Nordic Ware racks for their sturdy design. Line your baking sheet with parchment paper (like If You Care) to prevent sticking and make cleanup effortless.
The parchment also helps with even heat distribution, which is key for uniform baking.
Seed Toasting Pan
Toast your seeds in a nonstick skillet (I use Calphalon) for 3-4 minutes until fragrant—this enhances their nutty flavor. A mesh strainer helps cool seeds quickly, and a small bowl keeps them ready for topping. Toasting seeds in batches prevents burning and ensures even flavor development. 💫
Nutrition facts
Frequently asked questions
Can I make this seed bread without a Dutch oven?
Yes, but the crust won't be as crispy. Use a baking stone with a metal bowl inverted over it to create steam, or bake on a sheet pan with an ice cube tray filled with water nearby. For best results, preheat everything for 30 minutes before baking. The bread will still be delicious, just slightly less rustic.
How do I store leftover seed bread?
Wrap the cooled loaf in a clean kitchen towel and store at room temperature for up to 3 days—this keeps it fresh longer than plastic. For longer storage, slice and freeze portions wrapped in parchment. Toast directly from frozen for crispy results. The seeds stay crunchy when properly stored!
What if my dough doesn't rise properly?
Check your yeast first—it should be fresh (test by mixing with warm water and sugar; bubbles in 5 minutes means it's active). If the dough is too cold, let it sit at room temperature for 30 minutes before shaping. For slow fermentation, cold-proofing in the fridge works best—don't rush it! A warm spot near the oven helps speed things up if needed.
Can I substitute seeds for allergies or preferences?
Swap sesame for sunflower seeds (toasted) or pumpkin for chia seeds (ground). For nut-free options, try poppy seeds or quinoa seeds. Reduce total seed amount by 1/4 cup if substituting—some seeds are denser. Always toast seeds before using for maximum flavor!
Why does my bread have a dense crumb instead of open pockets?
This usually means underproofing or overworking the dough. Let the dough rise until it's 50-75% larger before shaping, and avoid kneading more than 8-10 minutes. For extra airiness, try adding 1 teaspoon baking soda to the dough (reduce salt by 1/4 teaspoon**). The cold proof in the fridge helps create those beautiful open crumbs!