
Breakfast & Brunch
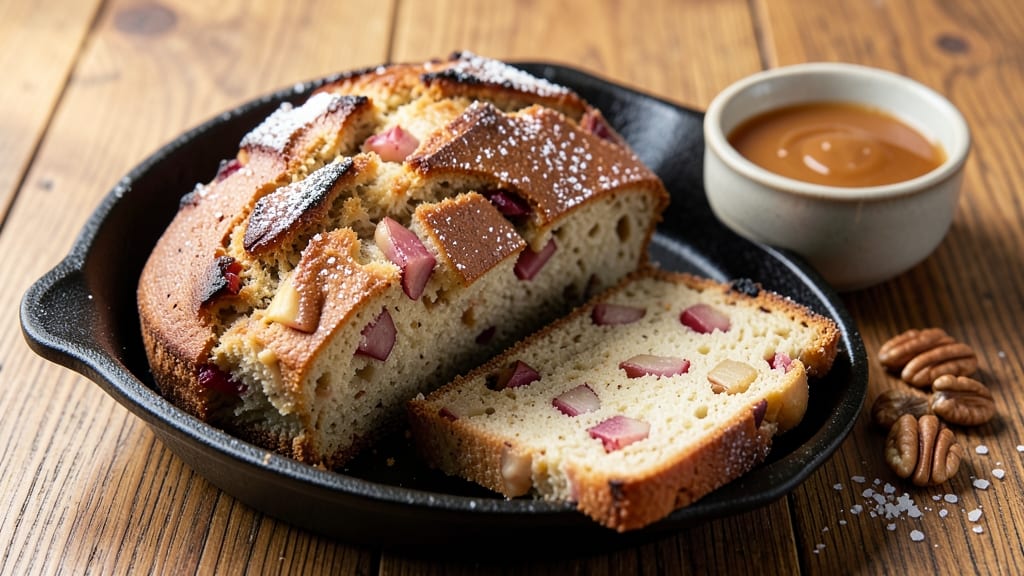
This apple breakfast bread transforms simple ingredients into a warm, spiced loaf that smells like autumn mornings. 🍏 The secret lies in swirling sweet apple chunks with cinnamon through tender dough, creating a crusty crown that's perfect for breakfast or snacking.
Unlike dense quick breads, this recipe bakes up light yet sturdy—ideal for toasting with butter or jam.
What makes this recipe special is the two-stage mixing that keeps the apples moist and the swirls intact. You'll start with a basic bread dough, then fold in diced apples and a cinnamon-sugar mixture that caramelizes beautifully during baking.
The 350°F oven ensures a golden crust while keeping the interior soft and fluffy.
By the time it emerges from the oven, you'll have a fragrant loaf with crisp edges and tender crumb, studded with juicy apple pieces. The aroma alone will wake up your household—imagine slicing into warm bread, slathering it with butter, and pairing it with coffee or yogurt.
This is the kind of homemade treat that makes weekend mornings feel like a celebration.
Use it for breakfast, snack time, or even dessert with a light glaze. The recipe scales easily, so you can bake one loaf for a family or two for sharing. Let's get started on creating your perfect apple breakfast bread!
Ingredients for apple breakfast bread
Pantry staples plus a few apples make this warm, spiced loaf smell like autumn mornings.
| Ingredient | Amount | Notes |
|---|---|---|
| All-Purpose Flour 🌾 | 4 cups | Sifted for light texture |
| Granulated Sugar 🍚 | ½ cup | White or light brown |
| Instant Yeast 🍞 | 2 ¼ tsp | Active dry works too |
| Salt 🧂 | 1 tsp | Kosher or sea salt |
| Unsalted Butter 🧈 | ½ cup | Cold, cubed for dough |
| Milk 🥛 | ¾ cup | Warm, 110°F |
| Large Eggs 🥚 | 1 whole | Room temperature |
| Medium Apples 🍏 | 2 whole | Honeycrisp or Fuji, peeled |
| Cinnamon 🌿 | 2 tbsp | Ground, not cassia |
| Light Brown Sugar 🍚 | ¼ cup | Packed, for filling |
| Vanilla Extract 🍯 | 1 tsp | Pure, not imitation |
| Vegetable Oil 🫒 | 2 tbsp | For greasing pan |
| Coarse Sugar 🍚 | 2 tbsp | For topping crust |
The apples are everything—Honeycrisp or Fuji are the sweetest, but Granny Smith works if you want tartness. Peel and dice them small (about 1/2-inch cubes) so they cook through but stay juicy. Trader Joe's usually has pre-peeled apples if you're short on time. For the cinnamon, McCormick or Penzeys ground cinnamon is my go-to—avoid cassia if you're sensitive to that stronger flavor. The yeast? Check the date—it's only good for a few months after opening, and it's the secret to that light, airy crumb. Keep it in the fridge until you're ready to mix the dough.
No warm milk? Heat regular milk in the microwave for 45 seconds, then let it sit for a minute. Short on butter? Coconut oil works too—just don't overmix the dough. The brown sugar in the filling can be swapped for white sugar if that's what's on hand, but the molasses notes from brown sugar caramelize beautifully. For extra flavor, add a pinch of nutmeg to the cinnamon-sugar mix. The vanilla extract is non-negotiable here—imitation vanilla tastes like perfume, not bread. And if you're feeling fancy, toss the diced apples in a little lemon juice before folding them into the dough to keep them from browning.
This dough needs time to rise, so plan ahead. Once shaped, let it proof in a warm spot for about 1 hour until doubled in size. For the best crust, brush the top with milk before baking and sprinkle with coarse sugar right before it goes in the oven. The bread keeps well at room temperature for 2 days in a bread bag, or you can freeze slices for up to 3 months. I always bake two loaves—one for breakfast, one for snacking. Toast it with butter and a sprinkle of cinnamon sugar for the full experience.
Why You'll Love This Recipe
- No Yeast Struggle: I swear by the instant yeast here—just toss it in warm milk with a pinch of sugar, and it works its magic while I mix the dough. No waiting for proofing, no second-guessing the rise. That butter-in-the-dough trick (cold cubes, by the way) keeps it tender without extra effort.
- Sweet-Savory Magic: The caramelized apples—tossed with cinnamon and a splash of vanilla—balance the buttery bread so perfectly. It’s like biting into a cross between a cinnamon roll and a scone, but with that warm, spiced apple crunch that makes me reach for seconds. (Yes, even on a Tuesday night.)
- Make-Ahead Miracle: This bread freezes like a dream—slice it, wrap it tightly, and it stays fresh for weeks. Toss a frozen slice in the toaster for a grab-and-go breakfast or reheat a chunk in the oven for a cozy snack. Honestly, I keep a loaf stashed in my freezer just for lazy mornings.
- Pantry Staple Power: You’re already using flour, sugar, and butter—this recipe just adds apples and a pinch of yeast. No specialty ingredients, no last-minute store runs. The dough comes together in one bowl, and the flavor? Ridiculously good without breaking the bank. My go-to when I need something hearty but simple.
Step-by-step instructions for apple breakfast bread
Here's how to make this fluffy, cinnamon-kissed bread with perfect swirls—no fancy skills needed.
👨🍳 Step 1: Mix the Dough with Warm Milk and Yeast
In a large bowl, whisk together the 4 cups all-purpose flour, 0.5 cup granulated sugar, 2.25 tsp instant yeast, and 1 tsp salt. Make a well in the center and add the 0.5 cup cold cubed butter, 0.75 cup warm milk (110°F), 1 whole large egg, and 1 tsp vanilla extract.
Use a wooden spoon to mix until the dough starts coming together, then turn it out onto a lightly floured surface. Knead for 5-7 minutes until smooth and elastic. Here's the thing—your dough should be soft but not sticky. If it's too wet, add 1-2 tbsp more flour until it holds together. Shape into a ball, place in a greased bowl, cover with a damp towel, and let rise in a warm place for 1 hour or until doubled in size.
🍎 Step 2: Prepare the Apple Filling and Shape the Loaf
While the dough rises, peel and finely dice the 2 whole medium apples (Honeycrisp or Fuji work best). In a small bowl, mix the diced apples with 2 tbsp cinnamon and 0.25 cup packed light brown sugar—this is your flavor bomb filling.
Once the dough has risen, punch it down and roll it out on a floured surface into a 12x18-inch rectangle (about ¼-inch thick). Spread the apple filling evenly over the dough, leaving a ½-inch border around the edges. Roll the dough tightly into a log, starting from the long side, and pinch the seam to seal.
🥘 Step 3: Shape the Crown and First Rise
Here's where the magic happens: shape the log into a crown. Place it seam-side down on a greased baking sheet, then gently pinch the dough to create a round loaf with a slightly raised edge. Make a small slit in the top and let it rise again for 30-45 minutes until puffy. The dough should spring back slowly when you press it gently with a finger.
Preheat your oven to 375°F while the dough rises. Brush the top of the loaf with a little milk for shine, then sprinkle with 2 tbsp coarse sugar—this gives you that perfect caramelized crust. Bake for 25-30 minutes until golden brown and the internal temperature reaches 190°F.
⏰ Step 4: Cool and Slice for Maximum Fluff
Let the bread cool on a wire rack for at least 10 minutes before slicing—this prevents it from turning gummy. The center should still be warm and the swirls should be visible through the crust. If you cut into it too soon, the filling might ooze out, so be patient!
Slice into 8 equal pieces and serve warm with butter or jam. The crust should be crispy on the outside with a soft, pillowy interior, and those apple-cinnamon swirls should be gooey and packed with flavor. Store any leftovers wrapped in a bread bag at room temperature for up to 2 days—though I doubt they'll last that long.
Pro Tips For Making Apple Breakfast Bread
- MIX APPLES LAST: Toss those diced apples into the dough right before shaping—otherwise, they’ll turn mushy and leak juice all over your counter. I learned this the hard way when my first batch looked like a soggy science experiment.
- SALT THE DOUGH: Sprinkle that salt into the flour before adding wet ingredients—it dissolves better and seasons the butter evenly. Skipping this step means your bread tastes bland, no matter how much sugar you add.
- DON’T OVERKNEAD: Yeast hates a workout. Mix just until the dough comes together, then stop—overworking it kills the rise and makes the bread dense. Two minutes max with a wooden spoon does the job.
- USE COLD BUTTER: Cut that unsalted butter into the flour chilled—it creates flaky layers instead of greasy clumps. I was skeptical until I tried it, and now I never skip this step.
Essential equipment for this dish
Dough Mixing Tools
Start with a large mixing bowl (I use my 8-quart stainless steel from OXO)—it gives you room to mix without spills.
A wooden spoon works best for combining wet and dry ingredients initially, but switch to a dough scraper (like the Kitchy brand) when turning out onto a floured surface.
For kneading, I recommend a stand mixer with a dough hook attachment—set it to speed 2 for 5-7 minutes to avoid overworking the gluten. If you're kneading by hand, use all-purpose flour on your surface and wet your hands slightly to prevent sticking. 🍞
Apple Prep Essentials
Peeling and dicing apples efficiently requires a sharp chef's knife (I love the Wüsthof Classic) and a mandoline for even cubes if you're ambitious. Toss the diced apples in a small glass bowl with cinnamon and brown sugar—this keeps everything contained.
A microplane comes in handy if you want to zest the apples for extra aroma. For storage, keep peeled apples in an airtight container with a damp paper towel to prevent browning. 🍏
Baking Pan & Proofing
Use a 9x5-inch loaf pan (I prefer Nordic Ware) for shaping your crown—it gives you clean edges. Line it with parchment paper for easy removal. For proofing, a proofing basket (like Weston Stages) keeps the dough contained, but a greased bowl works too.
Place your dough in a warm spot (I turn on my oven light for 10 minutes to create a warm environment) to help it rise faster. A digital thermometer ensures your milk is 110°F—too hot and it kills the yeast! 🌡️
Crust Perfection Tools
A pastry brush (I use Silpat brand) is key for brushing milk on the risen dough before baking—it creates that glossy finish. For the coarse sugar topping, a fine-mesh strainer helps distribute it evenly.
A meat thermometer (like Thermoworks Smoke) ensures your bread reaches 190°F internally—overbaking dries it out. For cooling, a wire rack prevents soggy bottoms. Pro tip: Spritz the rack with vegetable oil spray before placing the bread to keep it from sticking. ✨
Optional Extras
Add a cinnamon sugar shaker (like McCormick's brand) to dust fresh slices before serving. For glaze, mix ½ cup powdered sugar with 2 tbsp milk in a small bowl and drizzle over cooled bread.
A serrated bread knife (I recommend Global) gives clean slices without crushing the swirls. Store leftovers in a bread bag or beeswax wrap to maintain freshness. 💫
Nutrition facts
Frequently asked questions
Can I use any type of apple for this recipe?
Sweet apples like Honeycrisp or Fuji work best—they stay tender and caramelize beautifully. For a tart twist, Granny Smith apples add brightness, but they may keep their shape more. Avoid overly mealy varieties like Gala for this recipe, as they can make the bread dense.
Why does my dough stick to my hands when kneading?
This usually means your dough needs more flour or your kitchen is too humid. Lightly flour your work surface and wet your hands slightly before kneading. If the dough remains sticky after adding 1-2 tbsp flour, check your milk temperature—too warm milk can activate the yeast too quickly, making the dough overly wet.
How do I store leftovers to keep them fresh?
Wrap cooled slices in a bread bag or beeswax wrap and store at room temperature for up to 2 days. For longer storage, freeze slices in an airtight container for up to 3 months. Toast frozen slices directly from the freezer for crispy results.
Can I make this recipe without a stand mixer?
Knead the dough by hand on a floured surface for 5-7 minutes until smooth and elastic. Use your knuckles to check—if it springs back when poked, it's ready. Just be patient and work in a well-floured area to prevent sticking.
What's the best way to reheat stale slices?
For crispy crust and soft interior, wrap slices in aluminum foil and reheat in a 350°F oven for 5-7 minutes. Alternatively, toast in a toaster oven until golden. Avoid microwaving—it makes the bread gummy.