
Side Dishes
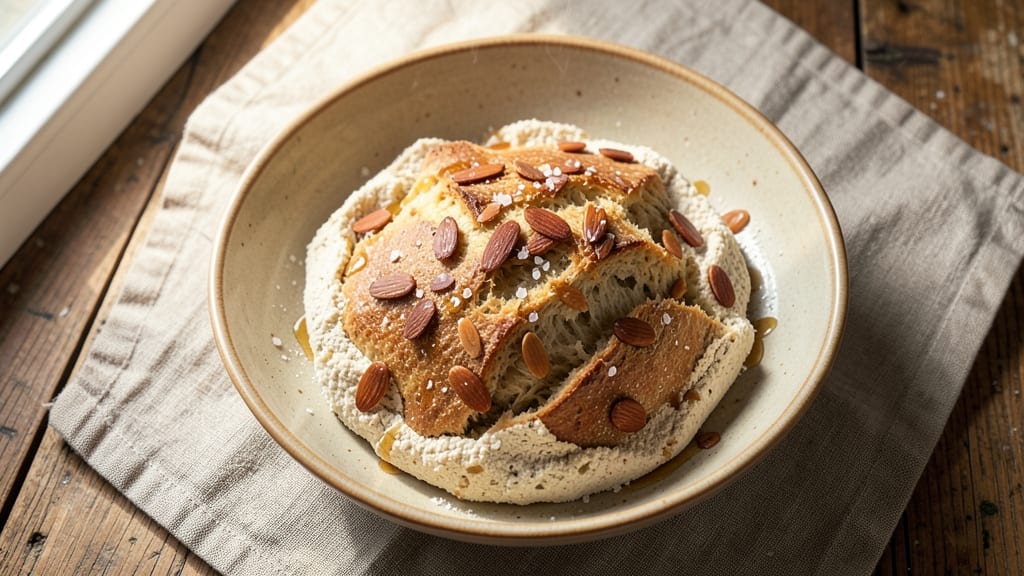
This almond flour artisan bread delivers the perfect balance of crusty exterior and light, airy crumb—all without gluten. I spent months perfecting the technique to mimic traditional sourdough texture using only almond flour, water, and a touch of psyllium husk for structure.
The result? A loaf with nutty depth, crisp edges, and a tender interior that surprises even gluten-free skeptics.
The secret lies in proper hydration and proofing—this dough behaves differently than wheat-based bread, requiring patience during mixing and resting. We'll use a vegan-friendly method with no eggs or dairy, yet achieve that signature artisan texture through precise temperature control and steam development in the oven.
No special equipment needed, just attention to detail.
By the time it emerges from the oven, you'll have a golden-brown loaf with a satisfying crackle when sliced. The crumb remains tender yet sturdy, perfect for sandwiches or toasted with olive oil.
What makes this recipe stand out is how it transforms humble almond flour into something that rivals traditional artisan bread.
This bread freezes beautifully for up to three months, making it ideal for meal prep. Let's get started on creating your gluten-free masterpiece that doesn't compromise on texture or flavor.
Ingredients for almond flour artisan bread
Eight simple ingredients transform into a loaf with restaurant-worthy texture and nutty depth.
| Ingredient | Amount | Notes |
|---|---|---|
| Blanched Almond Flour 🌰 | 3 ½ cups | Finely milled for smooth texture |
| Warm Water 💧 | 1 ¾ cups | 90°F for optimal hydration |
| Psyllium Husk Powder 🌿 | 2 tbsp | Key for gluten-free structure |
| Instant Yeast 🍞 | ½ tsp | Active dry works too |
| Fine Sea Salt 🧂 | 1 ½ tsp | Diamond Crystal preferred |
| Sugar 🍚 | 1 tbsp | White granulated works |
| Apple Cider Vinegar 🍎 | 1 tbsp | For slight tang and yeast activation |
| Olive Oil 🫒 | 2 tbsp | Extra-virgin for flavor |
| Cornmeal 🌽 | ¼ cup | For dusting bread pan |
| Ice Cubes ❄️ | ½ cup | For dough chilling |
The almond flour is non-negotiable—Bob's Red Mill or King Arthur brands give the smoothest texture. Blanched flour is key here; unblanched can taste bitter. For psyllium husk, grab the powdered version from Trader Joe's or health food stores—it dissolves better than whole husks. The yeast needs to be fresh, so check the expiration date if buying in bulk. I always keep a small jar in the fridge for this exact reason. Warm water is critical—too hot kills the yeast, too cold slows fermentation. Use a thermometer if you're unsure.
No almond flour? Sunflower seed flour works in a pinch for texture, though the flavor will differ. Ran out of apple cider vinegar? White vinegar or lemon juice at the same amount does the trick. The olive oil can be swapped for avocado oil, but stick with extra-virgin for that fruity depth. For a quicker rise, use one extra teaspoon of yeast, but don't overdo it—the flavor suffers. The cornmeal is optional but helps with that artisan crust. If you're gluten-free baking often, King Arthur's gluten-free measure is worth the investment for accurate conversions.
This dough is temperamental—keep it covered in the fridge for up to 48 hours if you need to prep ahead. The ice cubes are a trick to chill the dough quickly without shocking it. For the best crust, bake on a preheated stone or steel in a Dutch oven with a cup of boiling water on the bottom. The bread freezes beautifully: slice before freezing, then toast from frozen for 3 months of fresh-tasting loaves. Store wrapped in a cotton towel to maintain moisture.
Why You'll Love This Recipe
- No-Knead Magic: Honestly, I mix the almond flour, psyllium husk, and yeast in a bowl—no fancy equipment, no standing at the counter for hours. The psyllium does all the heavy lifting, giving it that artisan texture without the fuss.
- Nutty Crust Perfection: That toasted almond flavor? It’s like biting into a French baguette but with a warm, buttery richness from the blanched almond flour. The sea salt finishes it—simple, but chef’s kiss.
- Weeknight & Picnic Hero: Between us, this bread is my go-to for sandwiches, charcuterie boards, or even toast with jam. It stays fresh longer than regular bread, so I bake a loaf on Sundays and forget about it—until it’s gone.
- Budget-Friendly Luxury: Almond flour’s pricey, sure, but one batch stretches for days. I freeze slices for toast or croutons, and the psyllium keeps it light without needing expensive binders. Worth every penny for the flavor.
Step-by-step instructions for almond flour artisan bread
Here's how to bake gluten-free bread with a crisp crust and airy crumb—no special skills required.
Mix the Dough with Precision
In a large mixing bowl, combine the 3.5 cups blanched almond flour, 2 tbsp psyllium husk powder, 1.5 tsp fine sea salt, and 1 tbsp sugar. Whisk these dry ingredients together until fully incorporated—this ensures even distribution of the psyllium, which acts as our gluten substitute. The psyllium will form a gel when hydrated, creating that signature bread structure.
In a separate small bowl, whisk together the 1.75 cups warm water (about 90°F), 1 tbsp apple cider vinegar, and 2 tbsp olive oil. The warm water helps activate the yeast gently while the vinegar adds a subtle tang that balances the richness of the almond flour. Pour this wet mixture into the dry ingredients and stir vigorously with a wooden spoon or silicone spatula for 3-4 minutes until a shaggy dough forms. You'll notice the mixture thicken noticeably as the psyllium absorbs liquid—this is exactly what we want.
Incorporate Yeast and Rest the Dough
Add the 0.5 tsp instant yeast to the center of the dough and gently fold it in with your hands or spatula. The yeast will begin activating immediately, so work quickly but thoroughly. Once combined, cover the bowl with a damp kitchen towel and let the dough rest at room temperature for 10 minutes. This initial rest allows the psyllium to fully hydrate and the yeast to begin its work without overworking the delicate dough.
After 10 minutes, the dough should look slightly more cohesive and less sticky. If it's still too wet to handle, add 1-2 tablespoons more almond flour—just enough to make it manageable. The goal is a dough that's soft but not sticky, with a smooth, elastic texture. This resting period also helps prevent the dough from becoming too dense when baked.
Shape and Chill the Dough
Lightly dust a clean work surface with 0.25 cup cornmeal and turn out the dough. Gently shape it into a loose log about 8 inches long and 3 inches wide, using wet hands to prevent sticking. The dough will be softer than traditional bread dough, so handle it gently to avoid deflating any potential air pockets. Place the shaped dough on a parchment-lined baking sheet and cover it loosely with plastic wrap.
Transfer the dough to the refrigerator and chill for 30 minutes. This chilling step is crucial—it firms up the dough slightly, making it easier to handle and preventing excessive spreading during baking. The cold also helps create a better oven spring. While the dough chills, preheat your oven to 375°F with a baking stone or inverted baking sheet on the middle rack. This ensures even heat distribution for that perfect crust.
Score and Bake for Maximum Crisp
Remove the dough from the fridge and carefully transfer it to the preheated baking stone or sheet. Using a sharp serrated knife or razor blade, score the top of the dough with 3-4 diagonal slashes about ¼ inch deep. This allows steam to escape during baking, preventing the bread from cracking unpredictably and creating those beautiful ear-like crusts. Sprinkle the top with a pinch of fine sea salt for extra flavor.
Bake the bread for 30-35 minutes until the crust is deep golden brown and the internal temperature reaches 205°F when measured with an instant-read thermometer. The bread should sound hollow when tapped on the bottom. If the top browns too quickly, tent it loosely with aluminum foil to prevent over-browning while allowing the interior to finish cooking.
Cool and Slice for Perfect Texture
Remove the bread from the oven and transfer it to a wire rack to cool completely for at least 1 hour. This resting period is essential—almond flour bread continues to set as it cools, and rushing this step results in a gummy crumb. The crust will firm up beautifully while the interior develops that light, airy texture we're after.
Once fully cooled, slice the bread with a serrated knife for clean cuts. Each slice should reveal a light, open crumb with a crisp exterior that shatters slightly when bitten. Serve warm with butter or olive oil for the ultimate artisan experience—this bread holds up beautifully for 2-3 days when stored in an airtight container, though it's best enjoyed fresh from the oven.
Pro Tips For Making Almond Flour Artisan Bread
- Mix Until Sticky: Almond flour loves hydration, so don’t be shy—work that dough until it’s actually cohesive and slightly tacky to the touch. I used to stop when it looked "done," but it needs that extra 30 seconds where it clings to the bowl like wet sand. Skip this, and your loaf might end up dense or crumbly.
- Bloom the Yeast First: Toss that instant yeast into the warm water before adding anything else—give it 5 minutes to wake up. I learned this after a batch where the yeast just… vanished into the mix. A quick froth or bubbles means it’s ready to party; no bubbles? Start over. (Yes, even with instant yeast.)
- Weigh the Psyllium: That husk powder is finicky—use a scale for accuracy, not volume. A "pinch" is useless here; too little and your bread won’t hold shape, too much and it’ll taste like sawdust. I now measure it to the gram (1 tsp = ~2g) and never look back.
- Steam the First 15: Pop a metal tray in the oven, fill it with boiling water, then slide in your loaf when you transfer it from the Dutch oven. The steam locks in that crackly crust and prevents a sad, flat top. I used to skip this—big mistake. The difference is night and day.
Serving suggestions for this recipe
Classic Pairings
This bread pairs beautifully with avocado toast—mash 1 ripe avocado with 1 tbsp lime juice, salt, and black pepper, then spread generously. The nutty almond flavor complements the creamy avocado perfectly.
For a heartier option, try hummus and roasted veggies—the crisp crust stands up to the smooth dip and caramelized flavors. 🥑
Gourmet Spreads
Elevate your bread with whipped goat cheese mixed with honey and thyme leaves. The tangy cheese balances the richness of the almond flour, while the honey adds a touch of sweetness.
Another favorite is fig jam—spread a thin layer on warm slices and top with a sprinkle of flaky sea salt for a sophisticated bite. The jam's natural sweetness contrasts the bread's nutty depth.
Protein-Packed Combinations
Use this bread for grilled chicken sandwiches—pile on sliced grilled chicken, arugula, and a drizzle of balsamic glaze. The crusty exterior holds up perfectly to juicy chicken.
For a vegan option, try smoky tofu marinated in soy sauce, garlic, and maple syrup, then pan-fried until crispy. The almond bread's neutral flavor lets the tofu shine.
Breakfast Versatility
Toast slices and top with almond butter and sliced banana for a quick breakfast—add a sprinkle of cinnamon for warmth. For a fancier option, spread with ricotta cheese and drizzle with honey, then top with toasted walnuts.
The bread's crisp texture contrasts beautifully with the creamy ricotta, making it a standout morning treat. 🍞
Cheese Board Showstopper
Slice the bread into thick pieces and arrange on a cheese board with aged cheddar, brie, and blue cheese. The crisp crust pairs wonderfully with soft cheeses, while the nutty flavor cuts through richer options.
Add dried apricots, walnuts, and a drizzle of olive oil for a balanced, flavorful spread that's perfect for entertaining.
Meal Prep Tips
Make ahead by baking an extra loaf and storing it in an airtight container at room temperature for 2-3 days or freezing for 3 months. Toast slices straight from the freezer for quick sandwiches or snacks.
Pack slices with peanut butter and jelly for school lunches—they stay fresh longer than traditional bread. For variety, try garlic butter or pesto as dips to keep things interesting. ✨
Nutrition facts
Frequently asked questions
Why does this recipe use psyllium husk powder?
Psyllium husk powder acts as a gluten substitute, creating structure and elasticity in the dough. Without it, almond flour bread tends to be dense and crumbly. The powder forms a gel when hydrated, mimicking gluten's ability to trap gases and give the bread its signature open crumb. It's a game-changer for gluten-free baking!
Can I make this bread without a Dutch oven?
Yes! If you don't have a Dutch oven, use a baking stone or inverted baking sheet on the middle rack. For extra crispiness, place a metal bowl filled with boiling water on the bottom rack during the first 15 minutes of baking. This creates steam that helps develop that artisan crust. Just monitor closely to prevent over-browning.
How do I know when the bread is fully baked?
The bread is done when it reaches an internal temperature of 205°F and sounds hollow when tapped on the bottom. The crust should be deep golden brown with a crisp texture. If it browns too quickly, tent loosely with foil to prevent burning while the interior finishes cooking. Patience here ensures perfect results!
Why did my bread turn out dense instead of light? Dense bread usually results from underproofing or overmixing.
Can I add seeds or nuts to this recipe?
Fold in 1/4 cup chopped walnuts, sunflower seeds, or pumpkin seeds during the final mixing stage. For best results, toast the seeds/nuts first to enhance flavor. Just be mindful that adding too many can make the dough sticky—adjust with an extra tablespoon of almond flour if needed. The texture will be slightly heartier but still delicious!