
Side Dishes
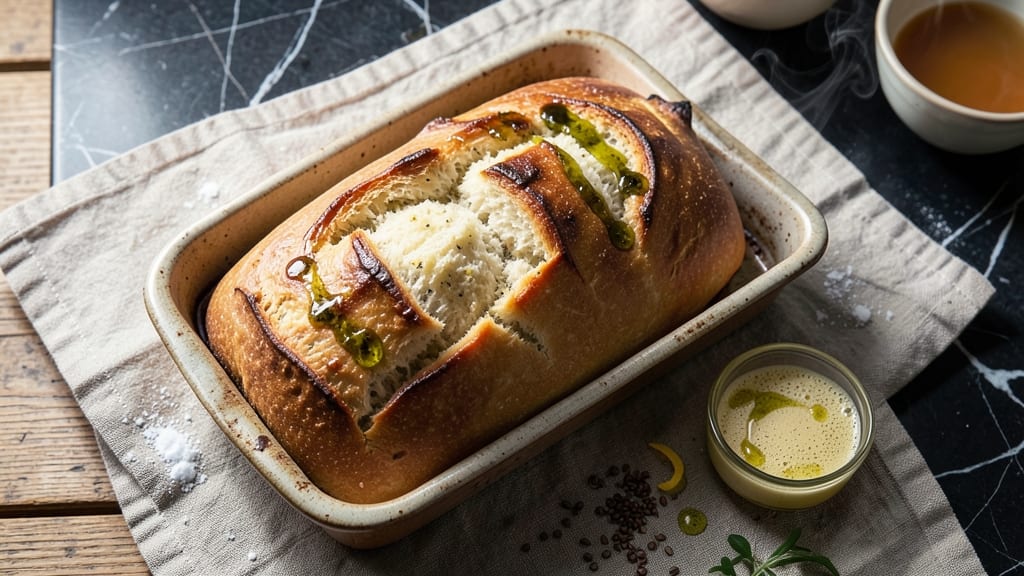
This allergen-free bread recipe delivers a crusty, satisfying loaf that meets every dietary need without compromise—no gluten, dairy, eggs, or nuts in sight.
After years of perfecting the art of allergen-conscious baking, I’ve developed a method that yields bread with a golden crust, airy crumb, and flavor that rivals traditional recipes. The secret lies in careful ingredient substitutions and precise technique, ensuring you never have to sacrifice texture or taste for dietary restrictions.
The foundation of this recipe is a blend of gluten-free flours (like brown rice and tapioca) that mimic the structure of wheat flour, while flaxseed meal replaces eggs for binding.
A splash of apple cider vinegar and baking soda creates that signature tang and lift, while olive oil adds richness without dairy.
What makes this recipe truly special is its versatility—it works for those avoiding gluten, dairy, eggs, or nuts, all while delivering a crusty exterior and tender interior that’s impossible to resist.
By the time you pull this loaf from the oven, you’ll have a restaurant-quality bread that’s perfect for sandwiches, toast, or simply enjoying on its own. The aroma alone will fill your kitchen with warmth, and the first bite reveals a satisfying crunch followed by a soft, airy crumb.
This isn’t just allergen-free—it’s a bread that proves dietary limitations don’t have to mean flavor compromises.
Whether you’re baking for a loved one with allergies or simply exploring gluten-free options, this recipe is your solution. The instructions are straightforward, and the results are consistently impressive. Let’s get started on a loaf that everyone can enjoy—no restrictions required.
Ingredients for allergen free bread
Gluten-free flours, flaxseed binding, and yeast create a crusty loaf that rivals traditional bread.
| Ingredient | Amount | Notes |
|---|---|---|
| Brown Rice Flour 🌾 | 1 ½ cups | For structure and texture |
| Tapioca Flour 🌾 | ¾ cup | Creates chewy, elastic crumb |
| Flaxseed Meal 🌱 | ¼ cup | Ground flaxseed for binding |
| Apple Cider Vinegar 🍏 | 2 tbsp | Activates baking soda |
| Baking Soda 🧂 | 2 tsp | For lift and tang |
| Extra-Virgin Olive Oil 🫒 | ½ cup | Adds richness and moisture |
| Water 💧 | 1 ¼ cups | Room temperature preferred |
| Salt 🧂 | 1 ½ tsp | Diamond Crystal preferred |
| Honey 🍯 | 2 tbsp | For subtle sweetness |
| Psyllium Husk Powder 🌿 | 1 ½ tsp | Enhances gluten-free structure |
| Active Dry Yeast 🍞 | 1 ½ tsp | For rise and airiness |
| Sesame Seeds 🌻 | 2 tbsp | For topping (optional) |
The flour blend is the heart of this recipe. Bob's Red Mill brown rice flour and tapioca flour from Anthony's Goods work best—they create that perfect chewy crumb. Psyllium husk powder might sound exotic, but it's a game-changer for gluten-free structure. Grab it from the baking aisle or order online if your store doesn't carry it. For the yeast, Saf-Instant is foolproof since it doesn't need proofing in water first. The flaxseed meal? Bob's Red Mill ground flaxseed is my go-to—it's finely ground and works perfectly for binding without that gritty texture.
No psyllium husk powder? Extra xanthan gum at half the amount works in a pinch, but the texture won't be quite as good. Substituting tapioca flour? Arrowroot starch works 1:1, but the crumb will be slightly more delicate. Running low on honey? Maple syrup or agave nectar at the same quantity keeps things sweet. The yeast is non-negotiable here—baking powder won't give you that proper rise. If you're making this ahead, store the dry ingredients separately for up to 2 weeks and mix just before baking. The sesame seeds? Skip them if you're avoiding nuts, but they add that wonderful crunch to the crust.
This dough is best used within 4 hours of mixing for optimal freshness, but you can shape and refrigerate it overnight if needed. The baked loaf keeps well for 3-4 days at room temperature wrapped in a clean kitchen towel, or 1 week in the fridge. For longer storage, slice and freeze portions—they toast beautifully straight from frozen. Pro tip: Spritz the loaf with water before baking for that restaurant-quality crust. The aroma alone will have your whole house craving slices.
Why You'll Love This Recipe
- No Mixer Needed: I swear by this—just stir, pour, bake. The flaxseed meal does all the binding work, so no kneading, no fuss. My hands stay clean, and the batter comes together faster than I can say "gluten-free."
- Taste Like Real Bread: Between us, the apple cider vinegar is the secret weapon. It cuts through the earthiness of the brown rice flour, giving it that bright, tangy lift. Honestly, my gluten-sensitive friends don’t even ask for substitutions anymore.
- Weeknight Magic: This bread is my go-to for toast, sandwiches, or even a quick French dip. The tapioca flour keeps it soft, so it holds up to soups and grilled cheese like a champ. (Yes, even on a Tuesday night.)
- Budget-Friendly Staple: Brown rice flour and tapioca starch are cheap, and this recipe stretches far. I make two loaves at once, freeze half, and still have enough for breakfast all week. No waste, no stress—just reliable, affordable bread.
Step-by-step instructions for allergen-free bread
This gluten-free, dairy-free bread delivers authentic texture and flavor without compromising dietary needs.
Activate the Yeast and Mix Wet Ingredients
In a small bowl, combine the 1.25 cups water with the 1.5 tsp active dry yeast and 2 tbsp honey. Let this mixture sit for 5-10 minutes until it becomes frothy—this confirms the yeast is alive and ready to work. The mixture should smell subtly sweet and yeasty, with visible bubbles forming on the surface.
In a separate large mixing bowl, whisk together the 0.5 cup extra-virgin olive oil, 2 tbsp apple cider vinegar, and 2 tbsp honey until fully emulsified. This creates a smooth base that will help bind the dry ingredients. The oil should turn slightly cloudy as it incorporates with the vinegar and honey, creating a homogenous mixture.
Combine Dry Ingredients and Form the Dough
In the same large bowl, sift in the 1.5 cups brown rice flour, 0.75 cup tapioca flour, 1.5 tsp salt, and 1.5 tsp psyllium husk powder. Gently fold these dry ingredients into the wet mixture using a wooden spoon or silicone spatula until just combined—you should still see some flour streaks. Overmixing at this stage can develop gluten-like properties in the flours, which we want to avoid.
Next, add the 0.25 cup flaxseed meal and the 2 tsp baking soda. The baking soda will react with the apple cider vinegar in the wet mixture, creating a gentle lift in the bread. Mix until everything is thoroughly combined and the dough comes together into a shaggy mass. At this point, the dough will be quite sticky, which is completely normal for gluten-free bread.
Knead and Rest for Optimal Texture
Transfer the dough to a lightly oiled surface and knead gently for 2-3 minutes until it becomes more cohesive. You won't be able to develop gluten like traditional wheat bread, but this step helps distribute the ingredients evenly. The dough should be soft, slightly tacky, and hold together when pressed between your fingers.
Place the dough in a lightly oiled loaf pan (or a bowl if free-form shaping) and cover tightly with plastic wrap. Let it rest at room temperature for 1 hour, or until it has risen by about 25-30%—you'll see the dough expand slightly and develop small bubbles on the surface. This resting period allows the flours to hydrate fully and the psyllium husk to activate, which is crucial for achieving that crusty exterior and tender crumb.
Bake for a Crusty, Golden Loaf
Preheat your oven to 375°F with a baking stone or inverted baking sheet on the middle rack. This ensures even heat distribution for a perfect crust. Once preheated, carefully transfer the dough (still in its pan or shaped on a parchment-lined baking sheet) to the oven. Bake for 40-45 minutes, until the top is deep golden brown and sounds hollow when tapped on the bottom.
Here's the thing—gluten-free bread can dry out quickly, so don't overbake. The internal temperature should reach 205-210°F when measured with an instant-read thermometer. If the top browns too quickly, tent the pan with aluminum foil after 20 minutes to prevent over-browning while the center finishes baking.
Cool and Finish for Maximum Flavor
Remove the bread from the oven and let it cool in the pan for 10 minutes before transferring to a wire rack. This brief cooling period helps set the crumb structure. While it cools, brush the top with a little extra-virgin olive oil and sprinkle with the 2 tbsp sesame seeds for added texture and flavor. The seeds should adhere lightly to the surface, adding a nutty crunch with each bite.
Allow the bread to cool completely before slicing—this ensures clean cuts and prevents a gummy texture. Once fully cooled, wrap any leftovers tightly in plastic wrap or store in an airtight container for up to 5 days. For best results, toast slices before serving to enhance the crust and bring out the bread's full flavor potential.
Pro Tips For Making Allergen Free Bread
- STIR FLAXSEED MEAL FIRST: Mix the flaxseed meal with 3x its weight in water (so 1 tbsp flaxseed + 3 tbsp water) and let it sit for at least 5 minutes before adding to the batter. I learned this the hard way—skipping it makes the bread dense and gummy, no matter how much you bake it.
- WEIGH YOUR FLOURS: Use a kitchen scale for brown rice and tapioca flour—volume measurements lie. A packed cup of brown rice flour can be 10% heavier than a scooped one, and tapioca flour clumps like crazy when spooned. My first batch turned out like a brick because I eyeballed it.
- DON’T OVERMIX THE BATTER: Stir just until the wet ingredients disappear—overmixing activates the gluten in brown rice flour, even though it’s gluten-free. You want a thick, shaggy dough, not a smooth one. I used to beat it like pancake batter, and the bread came out tough.
- BAKE UNTIL INTERNAL TEMP HITS 205°F: This bread doesn’t brown like wheat bread, so check with an instant-read thermometer at the lower edge. Pull it out early, and it’ll collapse; leave it too long, and it’ll dry out. I burned two batches waiting for a golden crust that never came.
Regional styles of this recipe
Italian Gluten-Free Focus
Inspired by traditional Italian panettone, this version swaps wheat flour for a blend of brown rice flour and tapioca flour while keeping the signature texture. Use 1 tbsp orange zest and 2 tbsp dried cranberries in the dough for that festive Italian flair.
Brush the baked loaf with melted dairy-free butter (like Miyoko's) and sprinkle with crushed pistachios for a nod to classic Italian flavors. 🍊
German Seed Bread Adaptation
For a German-inspired twist, add 1 tbsp caraway seeds and 1 tbsp poppy seeds to the dough. Replace sesame seeds with sunflower seeds for a nut-free option, and brush the baked loaf with a mix of olive oil and maple syrup before baking.
Serve warm with dairy-free butter and jam for a satisfying breakfast. The caraway adds a distinct, slightly sweet aroma that’s quintessentially German. 🌾
French Baguette Style
Shape the dough into a long, thin loaf for a baguette-style bread. Use a baking stone and steam the oven by placing a tray of boiling water on the lower rack for the first 10 minutes of baking.
Sprinkle the dough with coarse sea salt before baking for that authentic French crust. Once baked, brush with olive oil and sprinkle with poppy seeds or everything bagel seasoning for extra flavor. 🥖
Mexican Cornbread Fusion
Replace brown rice flour with cornmeal (use 1.5 cups fine cornmeal) and add ½ tsp cinnamon and ½ tsp cumin to the dough. Mix in ½ cup dairy-free shredded cheese (like Violife cheddar) and ¼ cup chopped jalapeños for a spicy kick.
Bake in a cast-iron skillet for a crispy exterior. Serve with salsa or guacamole for a delicious Mexican-inspired twist. 🌶️
Japanese Millet Bread
Swap brown rice flour for millet flour (use 1.5 cups) and add 1 tbsp grated ginger and 1 tbsp sesame oil to the wet ingredients. Shape the dough into a round loaf and brush the top with sesame oil before baking.
Once cooled, slice and spread with dairy-free cream cheese and sliced strawberries for a Japanese-inspired treat. Millet flour adds a nutty flavor that pairs beautifully with the sweet and tangy toppings. 🍓
Nutrition facts
Frequently asked questions
Can I make this bread without flaxseed?
Yes! If you're avoiding flaxseed, replace the 0.25 cup flaxseed meal with 0.25 cup chia seeds (ground) or 1 tbsp psyllium husk powder plus 0.25 cup water mixed into a gel. These alternatives provide similar binding properties for that perfect gluten-free structure. For an egg-free option, you could also use 1 tbsp ground flaxseed + 3 tbsp water as a direct substitute.
Why does my gluten-free bread turn out dense instead of crusty?
Dense gluten-free bread usually results from overmixing the dough or skipping the rest period. The psyllium husk and flours need time to hydrate fully—don't rush the 1-hour rest before baking. Also, ensure your oven is preheated with a baking stone for even heat distribution. If the dough feels too dry, add 1 tbsp extra water at a time until it's just sticky but workable.
How do I store this bread to keep it fresh longer?
For short-term storage, wrap the cooled loaf tightly in a clean kitchen towel or plastic wrap and store at room temperature for up to 3-4 days. For longer freshness, slice and freeze portions—they toast beautifully straight from frozen. To revive, warm slices in a toaster or oven at 350°F for 5-7 minutes until crispy. The sesame seeds help lock in moisture, but topping with oil before storage adds an extra moisture barrier.
Can I use this recipe for other types of allergen-free baking?
The same flour blend works for muffins, pancakes, or even crackers by adjusting the liquid ratios. For muffins, reduce the water by 2 tbsp and add 1 cup dairy-free yogurt for moisture. For crackers, roll the dough thin, cut into shapes, and bake at 350°F for 10-12 minutes until crisp. The flaxseed binding works in all these applications too—just scale the psyllium husk accordingly.