
Side Dishes
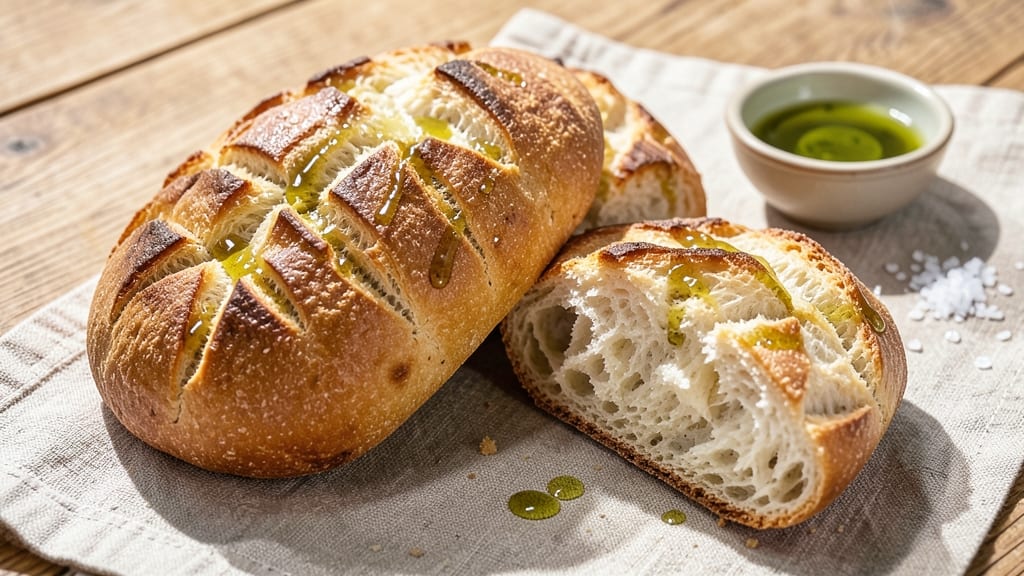
This authentic Syrian bread recipe delivers the crispy, flaky layers and golden sesame crust that define traditional Middle Eastern baking. 🌟 The secret lies in a precise blend of flour, yeast, and olive oil—traditionally kneaded by hand to develop gluten that creates those signature air pockets.
My version captures the essence of what you'd find in a Damascus bakery, where bread is baked in wood-fired ovens and served warm with every meal.
The dough requires patience—resting for at least 2 hours allows the gluten to relax and the flavors to meld, while the sesame seeds toast in the oven for that nutty crunch. This isn’t just bread; it’s a canvas for za’atar, olive oil drizzles, or even stuffed with spiced lamb.
The crust achieves that perfect balance of crispness and chewiness, while the interior remains soft and pillowy—exactly how it should be for soaking up sauces or wrapping falafel.
What makes this recipe truly special is its versatility. Use it as a side for grilled meats, as a wrap for shawarma, or simply torn into pieces to dip in hummus. The aroma alone—warm, yeasty, and slightly smoky—will transport you to a bustling Syrian kitchen.
Every bite delivers that satisfying contrast between the crunchy crust and tender interior, a hallmark of authentic Middle Eastern baking.
For best results, bake in a hot oven with a Dutch oven or cast-iron skillet to mimic wood-fired conditions. The bread keeps well for 2-3 days in a bread bag, but it’s best enjoyed fresh—still warm, with that perfect balance of textures. Let’s get started on mastering this classic.
Ingredients for authentic syrian bread
Nine simple ingredients transform into golden, flaky Syrian bread with sesame crunch—just like Damascus bakery classics.
| Ingredient | Amount | Notes |
|---|---|---|
| All-Purpose Flour 🌾 | 6 cups | High-protein preferred for chewiness |
| Active Dry Yeast 🍞 | ¼ oz | Or 2 1/4 tsp (1 packet) |
| Granulated Sugar 🍚 | 1 tbsp | Helps activate yeast quickly |
| Salt 🧂 | 2 tsp | Diamond Crystal preferred |
| Extra-Virgin Olive Oil 🫒 | ¾ cup | High-quality, fruity variety |
| Warm Water 💧 | 1 ¼ cups | 105°F-110°F for yeast activation |
| Sesame Seeds 🥜 | ½ cup | Toasted for maximum crunch |
| Coarse Sea Salt 🧂 | 1 tsp | For sprinkling on crust |
| Cornmeal 🌽 | ¼ cup | For dusting baking surface |
The flour is your foundation—King Arthur or Caputo bread flour (if you can find it) gives that perfect chew. Whole Foods or Middle Eastern markets often carry Caputo, but any high-protein flour works. Toast the sesame seeds in a dry pan for 3-4 minutes until golden—that nutty aroma is everything. The yeast needs to be fresh; if your packet's past its expiration, pick up a new one at Trader Joe's—they're always reliable. Warm the water to just below body temperature (105°F-110°F) so you don't kill the yeast. Too hot? Let it cool 5 minutes.
No sesame seeds? Toasted poppy seeds or crushed pistachios work in a pinch, though they won't be traditional. Running short on olive oil? Avocado oil or melted coconut oil keeps the same neutral flavor. The sugar might seem like overkill, but it's crucial for feeding the yeast quickly. Diamond Crystal kosher salt dissolves perfectly, but if you've got Morton, just add 1/4 tsp extra. For extra authenticity, substitute 1/4 cup of the flour with semolina—it gives that signature texture. And if you're feeling fancy, add 1 tsp of za'atar to the dough for a Middle Eastern twist.
This dough needs 2-4 hours of rising time—don't rush it! Cover with a damp towel and let it double in size. Room temperature is key—if your kitchen's cold, place the bowl near the oven with the light on. Shape the dough into a round loaf, then sprinkle with sesame seeds and coarse salt before baking. Bake in a cast-iron skillet or Dutch oven for that wood-fired bakery effect. The bread keeps best in a bread bag at room temperature for 2 days, or freeze for up to 3 months. Warm slices in a 350°F oven for 5 minutes to restore that bakery-fresh crunch.
Why You'll Love This Recipe
- No-Knead Magic: I swear by this—just mix the dough, let it rise overnight, and wake up to bread that’s effortless. The yeast does all the work while you sleep, and honestly? That’s my kind of cooking.
- Olive Oil Luxury: That rich extra-virgin olive oil brushed on the dough? It turns every bite into a little flavor bomb. Crispy outside, soft inside—no fancy ingredients, just pure satisfaction.
- Every Meal Upgrade: Slap this on a charcuterie board, tear it over a fresh salad, or dip it in hummus. It’s the one thing I always keep on hand because it works for breakfast, lunch, or dinner—no excuses.
- Budget Baking Win: Five ingredients, zero waste, and it keeps for days. Freeze extras for when you’re too tired to bake—just pop it in the oven, and boom, fresh bread without the hassle.
Step-by-step instructions for authentic Syrian bread with flaky layers
Here's how to craft the signature layers and nutty crust that make Syrian bread unforgettable.
👨🍳 Step 1: Activate the Yeast and Mix the Dough
In a large bowl, combine the 1.25 cups warm water (should feel like bath water, 105-110°F) with the 1 tbsp granulated sugar and 0.25 oz active dry yeast. Let sit for 5-10 minutes until foamy—this confirms your yeast is alive and ready to work. If it doesn't foam, your yeast might be dead.
In a separate large bowl, whisk together the 6 cups all-purpose flour and 2 tsp salt. Create a well in the center and pour in the yeast mixture along with the 0.75 cup extra-virgin olive oil. Using a wooden spoon or your hands, gradually incorporate the flour until a shaggy dough forms. This step builds the gluten that creates those signature flaky layers.
🥘 Step 2: Knead Until Silky Smooth
Turn the dough onto a lightly floured surface and knead for 8-10 minutes until smooth and elastic. You'll know it's ready when it springs back slowly when poked—this means proper gluten development. I like to use the "windowpane test" here: stretch a small piece thin enough to see light through it without tearing.
For extra authenticity, I fold the dough over itself every 2 minutes during kneading. This creates more surface area for the gluten strands to align, which translates to those beautiful flaky layers later. If the dough feels too sticky, add flour 1 tablespoon at a time—but don't overdo it or your bread will be dense.
⏰ Step 3: First Rise and Layering Prep
Place the dough in a lightly oiled bowl, cover with a damp towel, and let rise in a warm place for 1-1.5 hours until doubled in size. The kitchen counter near the oven works perfectly—just make sure it's not drafty. Poke the dough gently; if it springs back slowly, it's ready for the next step.
While the dough rises, toast the 0.5 cup sesame seeds in a dry skillet over medium heat for 3-4 minutes until golden and fragrant. This adds that nutty crunch that defines Syrian bread. Set aside to cool slightly—you'll use these later for the crust.
🍳 Step 4: Shape and Second Rise for Maximum Flakiness
Punch down the risen dough and divide it into 8 equal portions (about 120g each). Roll each portion into a 12-inch circle, about ¼-inch thick. Here's the secret: brush each circle generously with the remaining olive oil, then sprinkle with the toasted sesame seeds. Fold the dough in half like a taco, then fold it in half again to create a compact rectangle.
Stack the folded rectangles on a parchment-lined baking sheet, leaving 1-inch space between them. Cover again and let rise for 30-45 minutes until puffy. The folds create those signature layers—think of it like making a lasagna but with dough instead of pasta.
🔥 Step 5: Bake to Golden Perfection
Preheat your oven to 425°F with a baking stone or inverted baking sheet inside—this creates steam for maximum flakiness. Sprinkle the dough with 1 tsp coarse sea salt and bake for 15-18 minutes until deep golden brown and hollow-sounding when tapped.
For that authentic Syrian touch, I finish with a quick broil for 1-2 minutes to intensify the color. Immediately brush the hot bread with melted butter (if using) and sprinkle with extra sesame seeds while still warm. Serve warm with your favorite mezze—each slice should reveal those beautiful flaky layers you worked so hard to create!
Pro Tips For Making Authentic Syrian Bread
- STIR THE DOUGH WELL: Syrian bread dough needs a solid 5 minutes of vigorous stirring by hand—no mixer—to fully develop gluten. I used to skip this, and my bread turned out dense and chewy. The extra effort gives you that signature light, airy texture.
- USE WARM OLIVE OIL: Drizzle the dough with olive oil that’s just warm to the touch (not hot). Cold oil won’t activate the yeast properly, and boiling oil will kill it. Think "lukewarm bathwater" temperature—your dough will thank you with better rise.
- DON’T OVERPROOF THE DOUGH: Syrian bread dough doubles in size fast—keep an eye on it. If you leave it too long, the gluten relaxes, and your bread flattens when baked. Poke it: if it springs back slowly, it’s ready. If it stays dented, it’s overdone.
- SHAPE IT TIGHTLY: Roll the dough into a ball and press your palm into the center to create a deep dimple. This isn’t just for looks—it ensures even baking and prevents the edges from puffing up too much. My first attempts looked lopsided, but this trick fixes it every time.
Dietary considerations for these flavors
Gluten-Free Adaptation
For a gluten-free version, replace the 6 cups all-purpose flour with a 1:1 gluten-free flour blend like King Arthur Measure for Measure. Add 1 tsp xanthan gum to improve texture and elasticity.
The dough will be stickier, so work quickly and use extra cornmeal on your surface. Expect a slightly denser result, but still delicious with that sesame crunch. 🥜
Vegan Option
This recipe is naturally vegan-friendly! Simply omit the butter brush at the end and use olive oil instead. The yeast and olive oil provide all the richness needed.
For extra flavor, add 1 tsp nutritional yeast to the dough for that cheesy note. The sesame seeds and za'atar make it hearty enough to stand alone.
Low-Carb Version
Swap half the flour for almond flour (3 cups all-purpose + 3 cups almond flour) to cut carbs while keeping the flaky texture. Reduce the water by ¼ cup since almond flour absorbs less moisture.
The bread will be denser but still satisfying with that nutty sesame crust. Pair it with a protein-rich spread like hummus or tahini.
Allergen Considerations
This recipe contains wheat (gluten), sesame, and yeast. For sesame-free versions, use poppy seeds or crushed pistachios instead. Always check labels on yeast packets—some contain dairy or soy. If nut allergies are a concern, stick to the sesame seeds as they're the only nut-free option here.
Storage Tips
Store baked bread in an airtight container at room temperature for 2-3 days to maintain freshness. For longer storage, freeze slices wrapped in parchment paper for up to 3 months.
Reheat in a 350°F oven for 5 minutes to restore that bakery-fresh crunch. The layers stay flaky when properly stored!
Nutrition facts
Frequently asked questions about authentic Syrian bread
Why does Syrian bread have those signature flaky layers?
The layers come from folding the dough multiple times before baking—each fold creates a new layer, much like making lasagna sheets. The key is brushing each folded layer with olive oil before stacking, which prevents sticking and enhances the crispy texture. This technique mimics traditional wood-fired baking where steam builds up between layers during cooking.
Can I make this bread without a Dutch oven or baking stone?
Use a heavy oven-safe skillet or even a cast-iron pan. For extra steam, place a metal bowl filled with boiling water on the lower rack while baking. The bread will still develop those flaky layers, though the crust might be slightly less crispy. Preheat your pan in the oven for 10 minutes before adding the dough for best results.
How do I know when the dough is properly kneaded?
The dough is ready when it passes the "windowpane test"—stretch a small piece until it's thin enough to see light through without tearing. It should also spring back slowly when poked. For Syrian bread, kneading for 8-10 minutes by hand (or 5-6 minutes in a stand mixer with a dough hook) builds enough gluten for those signature layers. If it feels sticky, add flour 1 tablespoon at a time.
What's the best way to serve this bread?
Serve warm with a generous drizzle of extra-virgin olive oil and sprinkle of za'atar for the classic Syrian experience. It's perfect for wrapping shawarma, stuffing with spiced lamb, or using as a base for manakeesh. For a simple mezze spread, tear into pieces and serve with hummus, baba ganoush, or labneh. The layers make it ideal for soaking up sauces!
Why did my bread turn out dense instead of flaky?
Dense bread usually means the dough didn't rise enough or wasn't kneaded properly. Make sure your yeast is fresh (it should foam within 5-10 minutes in warm water) and that your kitchen is warm enough (above 75°F). Also check that you folded the dough correctly—each fold should be tight and even. For next time, let the dough rise until it's 50% larger before shaping.