
Desserts
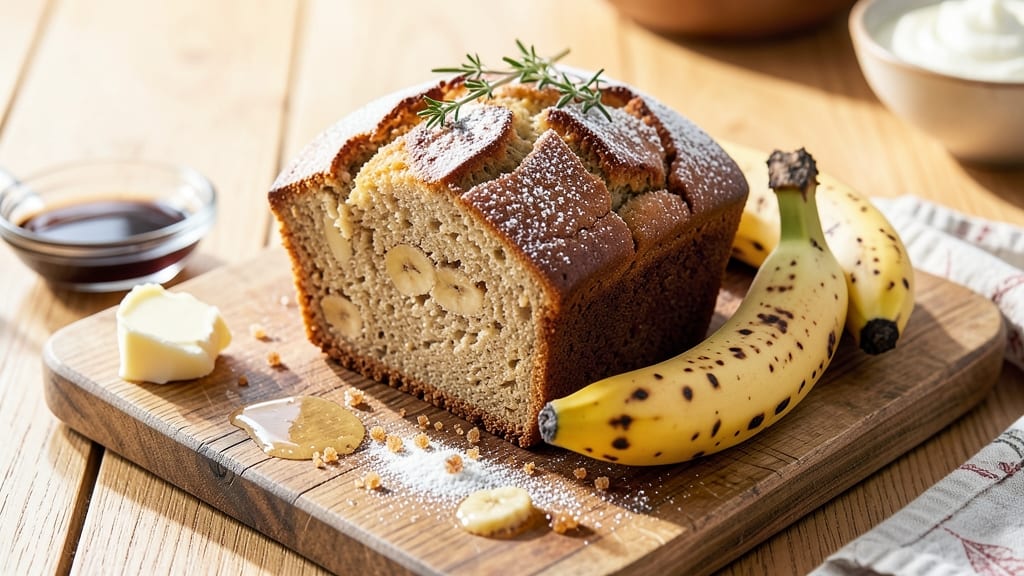
Aunty Sandy's famous banana bread recipe delivers that perfect balance of moist crumb and sweet vanilla swirls—every slice tastes like a trip down memory lane. 💛 The secret lies in ripe bananas and a simple swirl technique that creates those signature marbled patterns without overcomplicating the process.
I've baked this recipe dozens of times, and it never fails to impress, whether for breakfast or dessert.
What makes this recipe truly special is its foolproof method for achieving that signature texture—tender yet slightly dense, with just the right amount of sweetness. The vanilla-infused swirls add a sophisticated touch without requiring advanced baking skills.
You'll need basic pantry ingredients and about 60 minutes from start to finish, including baking time.
By the time it emerges from the oven, you'll have a loaf with a golden crust and that irresistible aroma that fills your kitchen. The moist crumb stays fresh for days, making it perfect for meal prep or gifting.
Whether you're a seasoned baker or just starting out, this recipe delivers consistently delicious results.
For an extra touch, consider adding walnuts or chocolate chips to the batter—just fold them in before baking. The possibilities are endless, but the classic version remains a timeless favorite. Let's get baking!
Ingredients for aunty sandy's famous banana bread
Classic pantry staples plus a few key ingredients for that signature moist crumb and vanilla swirl.
| Ingredient | Amount | Notes |
|---|---|---|
| Ripe Bananas 🍌 | 3 medium | Slightly squishy when pressed |
| All-Purpose Flour 🌾 | 2 ½ cups | Sifted for light texture |
| Granulated Sugar 🍚 | 1 cup | White or light brown |
| Brown Sugar 🍚 | ½ cup | Packed firmly |
| Unsalted Butter 🧈 | ¾ cup | Room temperature, full-fat |
| Pure Vanilla Extract 💧 | 2 tsp | High-quality, not imitation |
| Large Eggs 🥚 | 2 whole | Room temperature for blending |
| Baking Soda 🧂 | 1 tsp | Freshly opened |
| Salt 🧂 | ½ tsp | Fine sea salt |
| Milk 🥛 | ½ cup | Whole milk preferred |
| Powdered Sugar 🍚 | ¼ cup | For swirls only |
| Vanilla Bean Paste 💧 | 1 tbsp | For swirls, optional but recommended |
The bananas are non-negotiable—look for ones with brown spots that yield slightly when pressed. Trader Joe's and Whole Foods usually have the ripest ones, but your local grocery store's produce section works too. The butter should be room temperature—cold butter creates dense bread. For the vanilla, high-quality pure extract makes all the difference; imitation won't deliver that authentic flavor. I always double-check the baking soda expiration date—old baking soda loses its lift, and you'll end up with a dense loaf instead of that perfect rise.
No ripe bananas? Overripe frozen bananas work perfectly—thaw and drain excess liquid. Short on powdered sugar for the swirls? Granulated sugar blended into a fine powder does the trick. Want more depth? Add 1 tsp cinnamon to the dry ingredients. The vanilla bean paste is optional but adds that restaurant-quality touch—look for it in the baking aisle or online. If you're making this ahead, fold in chocolate chips or walnuts for extra texture, but keep the classic version simple for that authentic Aunty Sandy experience.
This bread keeps beautifully—3 days at room temperature in an airtight container, or 1 week in the fridge wrapped tightly. For longer storage, freeze slices individually for up to 3 months. The swirls stay vibrant if you cover the loaf with plastic wrap while it cools. Reheat slices in the microwave for 10-15 seconds to restore that fresh-from-the-oven warmth. I always make a double batch—one for the freezer, one for gifting. The aroma alone makes it worth baking.
Why You'll Love This Recipe
- No Fuss Mix-Ins: I just toss in those overripe bananas—no peeling required—and the flour, sugar, and melted butter come together in one bowl. Honestly, the only measuring I do is eyeballing the brown sugar, and somehow it always works out.
- Moist Magic: That combo of granulated and brown sugar keeps it tender for days, while the butter makes every slice rich and satisfying. (Yes, even on a Tuesday night, this is the kind of bread that makes you pause mid-bite.)
- Breakfast to Dessert: Serve it warm with butter for breakfast or a drizzle of honey for an after-dinner treat. I’ll be real: my kids ask for it at both meals, and I don’t even pretend to say no.
- Budget-Friendly Staples: Uses ingredients you already have—no specialty items, no last-minute grocery runs. The loaf lasts a week, and the leftovers? Perfect for quick toast or a snack when you’re in a rush.
Step-by-step instructions for Aunty Sandy's famous banana bread
Here's how to bake banana bread with a signature moist crumb and those signature vanilla-infused swirls.
👨🍳 Step 1: Prep Ingredients and Preheat the Oven
Start by preheating your oven to 350°F. While it heats, mash the 3 medium ripe bananas in a medium bowl until completely smooth—no lumps allowed. The bananas should be slightly squishy when pressed, indicating perfect ripeness. In a separate large bowl, whisk together the 2.5 cups all-purpose flour, 1 cup granulated sugar, 0.5 cup packed brown sugar, 1 tsp baking soda, and 0.5 tsp salt. Sift the flour mixture once to ensure a light, airy texture.
I like to use room-temperature ingredients for better blending. Let the 0.75 cup unsalted butter and 2 large eggs sit out for 30 minutes before mixing. This ensures the butter creams smoothly and the eggs blend fully into the batter. While you wait, measure out the 0.5 cup milk, 0.25 cup powdered sugar, and 1 tbsp vanilla bean paste for the swirls—this keeps everything organized and ready to go.
🍳 Step 2: Mix the Batter and Create the Swirls
In the large bowl with the dry ingredients, add the mashed bananas, 0.75 cup room-temperature butter, 2 tsp pure vanilla extract, and 2 large eggs. Mix on medium speed with an electric mixer for 2-3 minutes until completely combined and smooth. The batter should be thick but pourable—if it looks too stiff, add 1-2 tablespoons of milk to loosen it. This ensures the bread stays moist without being dense.
For the signature swirls, take ½ cup of the batter and mix it in a separate small bowl with the 0.25 cup powdered sugar and 1 tbsp vanilla bean paste. Stir until the powdered sugar dissolves completely—this creates those beautiful golden swirls throughout the loaf. The vanilla bean paste adds an extra layer of flavor that makes this recipe truly special.
🥘 Step 3: Assemble and Bake the Banana Bread
Grease a 9x5-inch loaf pan thoroughly with butter or line it with parchment paper for easy removal. Pour about ⅔ of the regular batter into the prepared pan, spreading it evenly with a spatula. This creates space for the swirls without overflowing. Drop spoonfuls of the vanilla-sugar mixture over the top, then gently swirl them into the batter using the tip of a butter knife. You want the swirls to look marbled but not too concentrated in one area.
Pour the remaining ⅓ of the regular batter over the swirls and spread it evenly with the back of a spoon. This top layer helps contain the swirls during baking. Bake in the preheated oven for 50-60 minutes, or until a toothpick inserted in the center comes out clean with just a few moist crumbs clinging to it. The bread is done when the top springs back when touched gently and has a deep golden color.
⏰ Step 4: Cool and Serve for Maximum Moisture
Remove the banana bread from the oven and let it cool in the pan for 10 minutes. This brief cooling period prevents the bread from cracking as it shrinks. Then transfer it to a wire rack to cool completely for another 30 minutes. I know it's tempting to slice into it immediately, but patience here ensures the perfect texture—moist crumb without a gummy center.
Once fully cooled, slice the banana bread into 8 equal pieces using a serrated knife. The swirls should be visible throughout each slice, and the crumb should be tender with a slight chew—this is the hallmark of Aunty Sandy's famous recipe. Store any leftovers wrapped in plastic at room temperature for 2-3 days, or freeze for up to 3 months for freshly baked flavor whenever you want it.
Pro Tips For Making Aunty Sandy'S Famous Banana Bread
- MASH THE BANANAS WELL: Don’t just chop them—spread those bananas on a plate first and smash them with a fork until they’re mostly smooth. I learned this the hard way when lumpy banana bits turned my bread into a textured experiment. The smoother the mash, the more even the crumb.
- CREAM THE BUTTER SLOW: Take your time softening the butter—room temp is key, but if it’s still cold, zap it in 10-second bursts. Cold butter won’t emulsify properly with the sugars, and your bread will turn out dense. I used to rush this, and the result was a sad, heavy loaf.
- DON’T OVERMIX THE DRYS: Once you add the flour, stir just until combined—maybe 10-12 strokes. Overmixing develops the gluten, and your banana bread will turn out tough instead of tender. I was guilty of this for years until I saw how much lighter the texture was when I stopped early.
- SWAP BROWN SUGAR FOR WHITE: If you’re short on brown sugar, use half white sugar instead—it’s a common shortcut, but the bread stays just as moist. My grandmother did this all the time, and the flavor difference is minimal if you’re not baking for a competition. (Just don’t tell Aunty Sandy.)
Essential equipment for aunty sandy's famous banana bread
Must-Have Mixing Tools
An electric mixer with a paddle attachment is my secret weapon for creaming butter and sugar perfectly—no lumps, no fuss. I swear by the KitchenAid Artisan Series for its consistent speed control, but budget-friendly options like the Hamilton Beach 6-Speed work just as well.
For hand mixers, the Cuisinart Power Advantage delivers enough torque for this recipe without breaking the bank. 💛
Baking Essentials
A 9x5-inch loaf pan is non-negotiable for this recipe—Wilton's nonstick loaf pans are my go-to because they release bread effortlessly. Line it with parchment paper for foolproof removal, especially if you're new to banana bread baking.
For measuring wet ingredients, a liquid measuring cup with spout prevents spills when adding milk or melted butter.
Swirl Creation Kit
You'll need a small separate bowl (I use a 4-cup Pyrex) for the vanilla-sugar swirl mixture to avoid cross-contamination. A butter knife with a sharp tip works best for creating those signature marbled swirls—look for one with a comfortable grip like the OXO Good Grips brand.
For precision, a small offset spatula helps spread the batter evenly.
Temperature Control
An oven thermometer is worth its weight in gold—many home ovens run 25°F hotter or colder than set. I recommend the Thermoworks Oven Thermometer for its accuracy.
Preheat your oven for at least 15 minutes before baking to ensure even heat distribution. For testing doneness, keep a toothpick handy to check for clean crumbs.
Cooling and Storage
Invest in a wire cooling rack to prevent soggy bottoms—Amazon Basics makes affordable options that work perfectly. For storage, airtight containers with silicone lids (like Rubbermaid Brilliance) keep slices fresh longer. A serrated knife (I love the Mercer Culinary Genesis) gives clean slices without crushing the crumb.
Optional Extras
If you're adding nuts or chocolate chips, a small scoop (like a cookie dough scoop) ensures even distribution. For extra flavor, a microplane helps grate fresh ginger or cinnamon directly into the batter.
And trust me—plastic wrap with parchment paper underneath makes slicing day-old bread a breeze without sticking. 💡
Nutrition facts
Frequently asked questions
Why does Aunty Sandy's recipe use both granulated and brown sugar?
The combination creates the perfect balance of flavors and textures. Granulated sugar dissolves quickly for even sweetness, while brown sugar adds moisture and a subtle caramel depth that keeps the crumb tender for days. The brown sugar also enhances the banana flavor naturally without overpowering it.
Can I make this banana bread without an electric mixer?
Use a sturdy wooden spoon or spatula to mix the batter by hand. For the butter and sugar, use a pastry cutter or your fingers to work it until smooth. The key is thorough mixing—just be prepared to put in a little extra elbow grease. The texture will still turn out perfectly moist!
What's the secret to getting those beautiful swirls?
The swirls come from using a butter knife to gently drag the vanilla-sugar mixture through the batter in a zigzag pattern. Start at one corner and work your way to the opposite side, then rotate the pan slightly and repeat. The goal is to create marbling without overmixing—think of it like painting with batter!
How do I know when my banana bread is fully baked?
Insert a toothpick into the center—the bread is done when it comes out clean with just a few moist crumbs (not wet batter). The top should also spring back slightly when gently pressed. If the edges are brown but the center seems underdone, tent the bread with foil and bake for another 5-10 minutes.
Can I substitute frozen bananas in this recipe?
Yes! Thaw frozen bananas first, then drain any excess liquid that forms. For every 1 cup of liquid released, reduce the milk in the recipe by 1 tablespoon. The texture remains identical—just