
Side Dishes
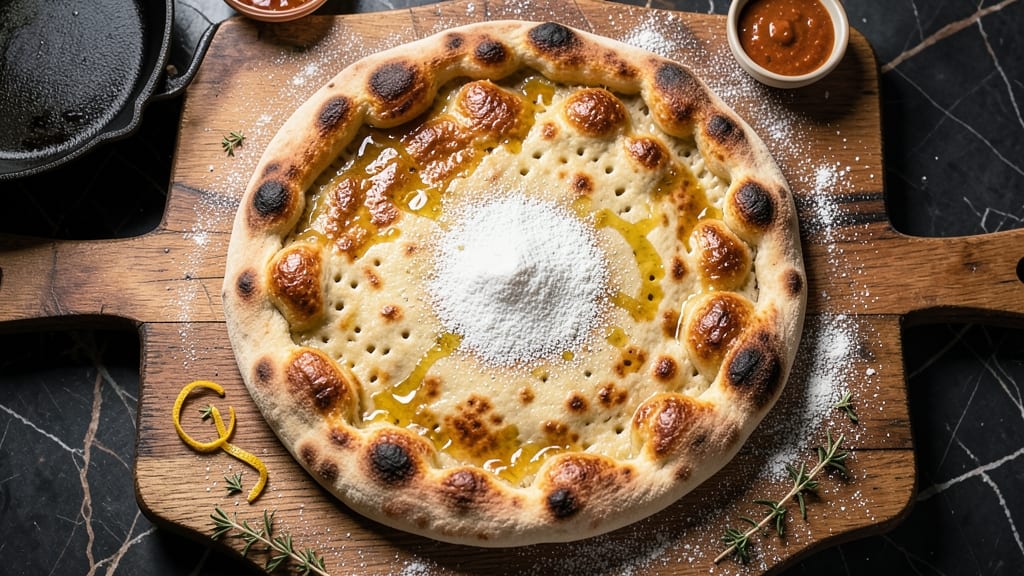
This artisan bread pizza dough recipe delivers the perfect balance of crispy crust and chewy center, transforming your homemade pizza into a restaurant-quality masterpiece. The secret lies in precise ingredient ratios, proper kneading, and patient proofing—techniques that create an airy, flavorful base capable of supporting any topping.
I've perfected this method over years of baking, ensuring every bite delivers that satisfying contrast of textures.
What sets this dough apart is its simplicity combined with professional results. With just five core ingredients—high-quality flour, water, yeast, salt, and a touch of olive oil—you'll achieve a dough that's both forgiving and impressive.
The kneading process develops gluten for structure, while cold proofing enhances flavor and texture without requiring constant attention. This method works equally well for classic Margherita pizzas or gourmet creations.
The dough's magic unfolds in the oven, where it develops a golden, crispy exterior while maintaining a soft, airy interior. This dual texture is what makes artisan bread pizza dough so special—it's sturdy enough to hold heavy toppings yet tender enough to melt in your mouth.
The dough can be prepped ahead of time, making it ideal for busy weeknights or weekend baking projects.
Once baked, you'll have a versatile canvas for any pizza creation. Use it as the foundation for your favorite tomato sauce and cheese combination, or experiment with creative toppings like caramelized onions, fresh basil, or prosciutto and arugula.
The possibilities are endless, but the foundation remains the same—this exceptional pizza dough that elevates every slice.
Ingredients for artisan bread pizza dough
Five simple ingredients transform into restaurant-quality pizza dough with crispy crust and chewy center.
| Ingredient | Amount | Notes |
|---|---|---|
| Bread Flour (high-protein, 12-14% protein) 🌾 | 3 ½ cups | King Arthur or Caputo preferred |
| Warm Water (105-110°F) 💧 | 1 ¼ cups | Use filtered for best flavor |
| Active Dry Yeast 🍞 | ¼ oz | Or 2 1/4 tsp (7g) |
| Extra-Virgin Olive Oil 🫒 | ½ cup | Fruity, not bitter |
| Diamond Crystal Kosher Salt 🧂 | 1 ½ tsp | Fine grain preferred |
| Semolina Flour (for dusting) 🌾 | ¼ cup | Or all-purpose in pinch |
| Cornmeal (for baking sheet) 🌽 | ½ cup | Or unbleached flour |
The flour is everything—King Arthur or Caputo bread flour gives that signature artisan texture. Whole Foods or specialty baking stores carry these, but King Arthur's works fine from any grocery store. If you're using all-purpose, add 1 tbsp vital wheat gluten to mimic high-protein flour. The yeast should be fresh—test it by dropping a pinch in warm water with a pinch of sugar; if it bubbles in 5 minutes, it's good. Warm water is key too—too hot kills yeast, too cold slows fermentation. I always use a thermometer to hit 105-110°F.
No bread flour? All-purpose plus 1 tbsp vital wheat gluten works in a pinch. Short on olive oil? Avocado oil or melted butter (not vegetable oil—it lacks flavor). The salt is non-negotiable for flavor, but if you're sensitive to sodium, reduce to 1 tsp. For a vegan version, use vegan olive oil (some brands contain animal products). The dough will be slightly less tender but still delicious. If you're in a hurry, instant yeast works at half the amount—no need to dissolve it first.
This dough keeps beautifully—wrap tightly in plastic and refrigerate for up to 3 days. For longer storage, freeze portions for up to 3 months. I always make a double batch and freeze half. When ready to use, let it sit at room temperature for 1-2 hours before shaping. The dough doubles in size during proofing, so don't overwork it when kneading. That first rise is where the magic happens—patience pays off with that perfect chewy crust.
Why You'll Love This Recipe
- Five-Ingredient Magic: I swear by this dough—just flour, yeast, water, oil, and salt. No confusing ratios, no hidden shortcuts. The high-protein bread flour gives it that perfect chew, and the warm water (yes, I use my thermometer) wakes up the yeast instantly. Honestly, it’s the kind of recipe where you can measure everything while scrolling through your phone.
- Crispy-Chewy Bliss: That olive oil in the dough? It’s not just flavor—it’s texture. You get this golden crust with a pillowy center that holds sauce like a dream. I’ll be real: the first time I tried it, I nearly burned my tongue waiting for the oven to cool down. Worth it.
- Weeknight to Party Star: Same dough, endless possibilities. Use it for dinner tonight with pepperoni and arugula, then freeze half for next month’s game night. Stretch it into focaccia for brunch or roll it out for calzones—my kids beg for the leftovers, and that’s saying something.
- Budget-Friendly Flex: A single batch costs me less than takeout, and it feeds four. The yeast and salt are pennies, the flour lasts forever, and you can even use store-brand olive oil without sacrificing taste. Between us, this is how I feed my family without breaking the bank—no apologies.
Step-by-step instructions for artisan bread pizza dough
This dough delivers that perfect balance of crispy crust and chewy center every time—just follow these precise steps.
Activate the Yeast with Warm Water
In a medium bowl, combine the 1.25 cups warm water (105-110°F) with the 0.25 oz active dry yeast. Stir gently and let sit for 5-10 minutes until foamy. This indicates the yeast is active and ready to work. If it doesn't foam, your yeast may be dead—start fresh with new yeast.
I always use filtered water here because it reduces impurities that can inhibit yeast activity. The water should feel warm to your wrist but not hot—too hot kills the yeast, too cool makes it sluggish. This step is where all the magic begins, so don't rush it.
Mix the Dough with Bread Flour and Olive Oil
Add the 3.5 cups bread flour (high-protein, 12-14%) and 1.5 tsp Diamond Crystal kosher salt to the yeast mixture. Stir with a wooden spoon until a shaggy mass forms, then pour in the 0.5 cup extra-virgin olive oil. Mix vigorously for 2-3 minutes until the dough comes together.
The high-protein flour is crucial here—it develops gluten better than all-purpose, giving you that perfect chewy texture. You'll know you've mixed enough when the dough pulls away from the sides of the bowl and forms a smooth, elastic ball. If it's too sticky, add a tablespoon or two of flour, but don't overdo it.
Knead the Dough for Optimal Gluten Development
Turn the dough onto a lightly floured surface and knead for 8-10 minutes by hand, or use a stand mixer with a dough hook on medium speed for 5-6 minutes. The dough should become smooth, elastic, and slightly tacky to the touch. This kneading step builds the gluten structure that gives pizza dough its signature chew.
I press down gently on the dough during the first minute—this prevents it from curling and ensures even contact with the surface. When you poke the dough with your finger and it springs back slowly (not immediately), you've developed enough gluten. If it springs back too quickly, knead another minute or two.
First Rise for Flavor and Texture
Lightly coat a large bowl with olive oil, place the dough inside, and cover with a damp towel or plastic wrap. Let it rise in a warm place (like the top of your fridge with a light bulb nearby) for 1-2 hours, or until it has doubled in size. This first rise allows the dough to develop flavor and texture.
Don't be tempted to rush this step—proper fermentation is what creates that authentic artisan bread flavor. The dough should feel light and airy when pressed gently. If it doesn't rise much, your yeast might need more time or warmth. This is where patience pays off in the final texture.
Shape and Final Rest Before Baking
Punch down the risen dough to release air, then divide it into 4 equal portions (about 1 pound each). Shape each portion into a round ball, then place on a baking sheet dusted with 0.5 cup cornmeal. Cover with a damp towel and let rest for 30 minutes at room temperature.
This final rest relaxes the gluten strands, making the dough easier to stretch and preventing it from shrinking back when you add toppings. I like to dust the surface with 0.25 cup semolina flour just before baking for that classic textured crust. The dough should feel slightly firm but still pliable—ready to transform into your perfect pizza.
Pro Tips For Making Artisan Bread Pizza Dough
- Measure Water Precisely: Use a scale for the water—bread flour absorbs exactly 60-65% hydration by weight. I learned this after making dough that was either too sticky or too dry; the scale removes guesswork for that perfect balance.
- Salt the Water First: Dissolve the kosher salt in the warm water before mixing—it distributes evenly and cuts down on sticky hands. (Yes, even if you’re impatient like me.) Skipping this step means uneven flavor and a dough fight mid-knead.
- Proof Until Doubled, Then Wait: Let the dough rise until it’s just doubled, then give it 15-30 minutes more—this is when gluten fully relaxes for stretch. I used to rush it, and the crust always turned out dense instead of airy.
- Oil Your Hands, Not the Dough: Lightly coat your hands with olive oil when handling the dough—it prevents sticking without adding extra fat to the recipe. (This isn’t the prettiest method, but it’s the tastiest.)
Flavor customization for this recipe
Herb-Infused Dough
Add 1 tbsp fresh rosemary or 2 tbsp chopped basil directly to the flour before mixing. These herbs infuse the dough with aromatic depth that pairs beautifully with tomato-based sauces.
I like to use dried herbs in half the amount if fresh aren't available—just crush them lightly between your fingers to release their oils. For a Mediterranean twist, try 1 tsp dried oregano with a pinch of red pepper flakes. 🌿
Garlic-White Pizza Base
Replace half the olive oil with 2 tbsp minced garlic (about 4 cloves) mixed into the dough. This creates a flavorful foundation perfect for white pizzas with ricotta, mozzarella, and fresh herbs.
I also add ½ tsp garlic powder to the flour for extra punch. The dough will have a subtle garlic aroma that enhances every bite without overpowering toppings.
Whole Wheat Version
Swap 1 cup of the bread flour for whole wheat flour to create a nutty, heartier dough. The texture will be slightly denser but still chewy. I recommend King Arthur whole wheat flour as it has better gluten development than store-brand options.
For best results, add 1 tbsp vital wheat gluten to maintain structure. This version pairs wonderfully with roasted vegetables and sharp cheeses like pecorino.
Spicy Arrabbiata Dough
Add 1 tsp red pepper flakes and ½ tsp crushed fennel seeds to the flour for a dough with built-in heat and licorice notes. This works especially well with tomato-based sauces and creamy cheeses like mozzarella and ricotta.
For extra kick, mix 1 tbsp tomato paste into the dough along with the olive oil. The dough will have a vibrant red hue and a subtle tangy flavor that complements spicy toppings perfectly. 🌶️
Cheesy Pull-Apart Dough
For a cheesy pizza experience, mix ½ cup shredded Parmesan cheese directly into the dough during the final kneading stage. This creates a dough that's perfect for making cheesy bread or loaded pizza slices.
I recommend using freshly grated Parmesan for the best flavor. The cheese adds richness while maintaining the dough's structure. This version is ideal for hearty toppings like sausage, mushrooms, and extra cheese.
Sweet Gluten-Free Option
Create a gluten-free version by replacing the bread flour with 3 cups gluten-free all-purpose flour blend (like Bob's Red Mill 1:1) plus 2 tbsp xanthan gum. Add 1 tbsp honey or maple syrup to the water for subtle sweetness.
This dough works beautifully for dessert pizzas with toppings like cinnamon sugar, Nutella, or fresh berries. The texture will be slightly crumbly but still chewy in the center. 🍯
Nutrition facts
Frequently asked questions
Can I use all-purpose flour instead of bread flour?
Yes, but you'll need to add 1 tbsp vital wheat gluten per 3 cups all-purpose flour to mimic the high-protein structure. This maintains the chewy texture. If you skip the gluten, the crust may be thinner and less elastic. For best results, use King Arthur all-purpose flour as it has slightly better gluten development than store brands.
How do I know when the dough is properly kneaded?
The dough is ready when it springs back slowly (not immediately) when poked with your finger. It should feel smooth, elastic, and slightly tacky—not sticky. For hand-kneading, aim for 8-10 minutes of consistent stretching and folding. If it's too sticky, add just enough flour to prevent sticking—over-flouring weakens gluten development.
What's the best way to store leftover dough?
For short-term storage, wrap tightly in plastic wrap and refrigerate for up to 3 days. For longer storage, freeze portions for up to 3 months. Thaw overnight in the fridge—never at room temperature. When ready to use, let it sit at room temperature for 1-2 hours before shaping. The dough will be slightly firmer after freezing but still pliable.
Why did my dough collapse after baking?
This usually happens from overproofing (letting it rise too long) or underbaking. The dough should double in size during the first rise but not collapse when touched. For baking, preheat your oven to 475°F and bake for 12-15 minutes until golden brown. If using a pizza stone, preheat it first for 30 minutes to ensure proper heat transfer.
Can I make this dough ahead of time?
This dough is perfect for meal prep. After the first rise, shape the dough into balls, wrap tightly, and refrigerate for up to 3 days or freeze for 3 months. When ready to bake, let the dough sit at room temperature for 1 hour before shaping. The cold rise actually enhances flavor and texture—it's a professional baker's trick!