
Desserts
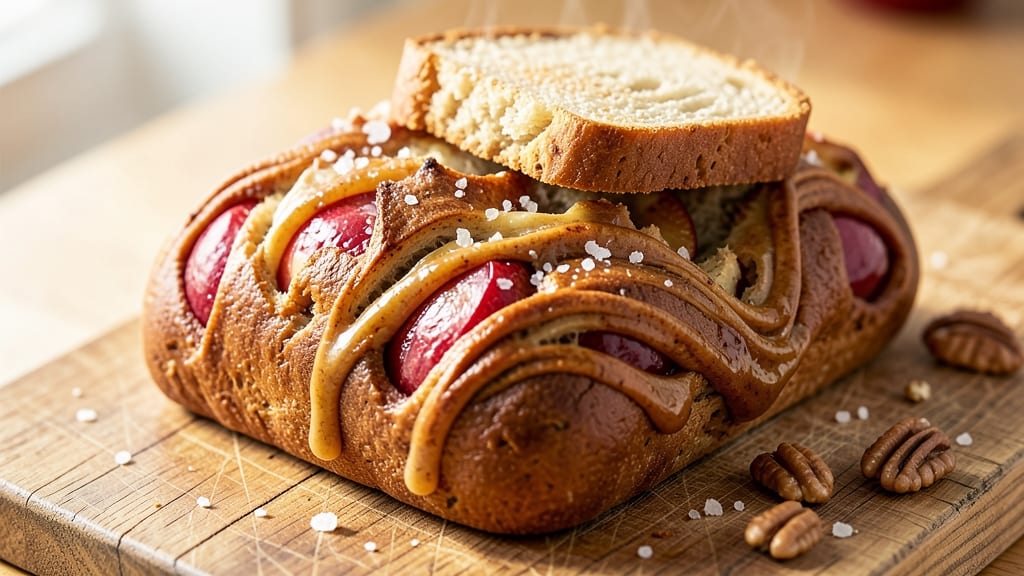
This apple cinnamon yeast bread recipe delivers the perfect balance of tender crumb and warm spice swirls that make every slice feel like a hug. 💛 The secret lies in a simple dough enriched with applesauce for moisture and cinnamon-infused filling that bakes into golden, caramelized perfection.
Unlike store-bought loaves, this version develops deep flavor through proper proofing and baking techniques that create that signature fluffy texture.
What sets this recipe apart is the combination of classic yeast bread structure with the comforting flavors of autumn—cinnamon, nutmeg, and tender apple pieces that melt into the dough. The dough requires just 30 minutes of active time (plus proofing), making it ideal for weekend baking projects.
I've tested this recipe countless times to ensure it rises properly, develops a crisp golden crust, and maintains a soft interior that stays fresh for days.
By the time you pull it from the oven, you'll have a loaf with a fragrant, spice-infused aroma that fills your kitchen, a crackly crust that gives way to tender layers, and pockets of caramelized apple filling throughout.
The applesauce keeps it moist without making it dense, while the cinnamon filling creates those beautiful swirls that make it visually appealing and irresistibly delicious.
This bread works beautifully as a breakfast treat, dessert, or even a special occasion loaf. The recipe includes optional add-ins like raisins or chopped nuts for extra texture and flavor. Let's get started on creating your perfect apple cinnamon yeast bread!
Ingredients for apple cinnamon yeast bread
Simple pantry staples plus a few seasonal touches create this cozy apple cinnamon yeast bread.
| Ingredient | Amount | Notes |
|---|---|---|
| All-Purpose Flour 🌾 | 4 cups | Sifted for light texture |
| Granulated Sugar 🍚 | ¼ cup | White or light brown |
| Instant Yeast 🍞 | 2 ¼ tsp | Single-use packet preferred |
| Unsalted Butter 🧈 | ½ cup | Softened to room temperature |
| Unsweetened Applesauce 🍎 | ½ cup | Unsweetened for balance |
| Large Eggs 🥚 | 1 whole | Room temperature |
| Milk 🥛 | ½ cup | Warm to room temperature |
| Salt 🧂 | 1 tsp | Kosher or sea salt |
| Ground Cinnamon 🌿 | 2 tbsp | Freshly ground preferred |
| Ground Nutmeg 🌿 | ½ tsp | Freshly grated for warmth |
| Granny Smith Apples 🍎 | 1 ½ cups | Peeled, finely diced |
| Light Brown Sugar 🍚 | ¼ cup | Packed firmly |
| Raisins 🍇 | ¼ cup | Optional, chopped walnuts too |
The flour is the foundation—King Arthur or Gold Medal bakers' flour works best for that signature soft crumb. Penzeys or local spice shops carry excellent cinnamon and nutmeg, but regular grocery store brands are fine too. For the apples, Granny Smith keeps the filling tart and prevents browning. I always peel mine—it keeps the filling from getting too watery. The unsalted butter should be soft but not melted when you mix it, so take it out of the fridge 30 minutes before starting. If you're in a rush, microwave it for 20 seconds to just soften.
No applesauce? Substitute mashed ripe banana at the same amount—it adds moisture but a slightly different flavor. Running low on brown sugar? White sugar plus a pinch of molasses works in a pinch. The raisins are optional but add nice texture—soaked in warm water for 10 minutes first if you use them. For extra richness, swap half the milk for heavy cream. If you're baking at high altitude, increase the flour by 2 tbsp to compensate for the thinner air. The yeast is non-negotiable here—expired yeast won't rise, so check the date on that packet.
This dough is best made fresh but can be refrigerated for up to 24 hours if you prep it the night before. Wrap tightly in plastic wrap to prevent drying. The baked loaf keeps well at room temperature for 2-3 days in a bread bag, or you can freeze slices for up to 3 months. For reheating, wrap slices in a damp paper towel and microwave for 15 seconds. The filling stays gooey when reheated—perfect for toast. I always bake two loaves—one for breakfast, one for dessert.
Why You'll Love This Recipe
- No-Knead Magic: I swear by this recipe because it actually lets you skip the kneading—just mix, let the yeast do its thing, and bake. The applesauce keeps it moist without extra fuss, and honestly? My dough never sticks to my hands again.
- Cinnamon-Apple Bliss: That warm, spiced aroma when it’s baking? It’s like autumn in a loaf. The butter and sugar caramelize just enough to give every slice a buttery-sweet crunch, while the applesauce adds a subtle, natural sweetness that makes it taste homemade in the best way.
- Breakfast to Brunch: This bread is my go-to for toast in the morning, but it’s also perfect for French toast or brunch casseroles. Between us, I’ve even used slices to top yogurt bowls when I’m lazy—yes, really—and it still feels special.
- Budget-Friendly Staple: A single batch feeds my family for days, and the ingredients cost pennies. The applesauce replaces oil, the yeast stretches the dough effortlessly, and the sugar is minimal—just enough to make it taste like a treat, not a splurge. My wallet thanks me every time.
Step-by-step instructions for apple cinnamon yeast bread
Here's how to craft a tender loaf with perfect spice swirls and a crackly crust.
👨🍳 Step 1: Mix the Dough Base
In a large mixing bowl, combine the 4 cups all-purpose flour, 2.25 tsp instant yeast, 1 tsp salt, 0.25 cup granulated sugar, and 2 tbsp ground cinnamon. Whisk these dry ingredients together until evenly distributed—this ensures consistent flavor throughout the dough.
Next, add the 0.5 cup softened unsalted butter, 0.5 cup unsweetened applesauce, 1 whole large egg, and 0.5 cup warm milk. Mix with a wooden spoon or dough whisk until the ingredients come together into a shaggy mass. The dough should be sticky but manageable—don't worry if it looks wet at this stage. Cover the bowl with a damp kitchen towel and let it rest for 15 minutes at room temperature. This brief rest helps the gluten relax, making the dough easier to handle.
🍳 Step 2: Create the Spice Filling
While the dough rests, prepare the filling in a small bowl. Combine the 1.5 cups peeled, finely diced Granny Smith apples, 0.25 cup packed light brown sugar, 0.25 cup raisins, and 0.5 tsp ground nutmeg. Mix gently to distribute the nutmeg evenly—this adds warmth that complements the cinnamon. Set this mixture aside until ready to incorporate.
Here's the thing—using Granny Smith apples gives the best balance of tartness and texture. If your apples are particularly wet, drain them briefly in a sieve to remove excess moisture, which can make the filling too soggy when baked.
🥘 Step 3: Knead and Shape the Dough
After the dough rests, turn it onto a lightly floured surface and knead for 5-7 minutes until smooth and elastic. You'll know it's ready when it springs back slowly when poked with a finger. If the dough feels too sticky, add 1 tablespoon flour at a time until it becomes workable but not dry.
Divide the dough into two equal portions. On a floured surface, roll each portion into a 12-inch circle about ¼-inch thick. Spread half of the apple filling evenly over one circle, leaving a ½-inch border around the edges. Top with the second circle and gently press the edges to seal, creating a ½-inch thick log. Repeat with the remaining dough and filling.
🔥 Step 4: Proof and Bake to Perfection
Place the shaped loaves seam-side down in two lightly greased 9x5-inch loaf pans. Cover with a damp towel and let them proof in a warm place for 1-1.5 hours, or until they've risen to about 1 inch above the pans. The dough should feel springy when pressed gently with a finger—this indicates proper proofing.
Preheat your oven to 375°F. Bake the loaves for 35-40 minutes until the tops are deep golden brown and an instant-read thermometer inserted into the center reads 190-195°F. The bread should sound hollow when tapped on the bottom.
⏰ Step 5: Cool and Serve Warmly
Remove the loaves from the pans and transfer them to a wire rack. Let them cool for 10 minutes before slicing—this prevents the bread from falling apart. The interior should be tender with moist, spiced apple swirls throughout, while the crust should be crisp and caramelized.
For best results, serve the bread warm with a pat of softened butter or a drizzle of honey. The raisins and apples will be plump and flavorful, and the cinnamon-nutmeg aroma will fill your kitchen. Store any leftovers wrapped in plastic at room temperature for up to 2 days, or freeze for longer storage.
Pro Tips For Making Apple Cinnamon Yeast Bread
- Weigh Your Butter: The recipe calls for unsalted butter, but scooping it straight from the fridge leads to uneven dough. Use a kitchen scale for 100g—packed butter melts more predictably, and you’ll avoid dry spots where butter didn’t incorporate fully. (Yes, even if you’re impatient like me, resist the urge to eyeball it.)
- Proof Yeast in Warm Applesauce: Skip the water—mix the instant yeast with ¼ cup of the unsweetened applesauce first. The natural sugars in the applesauce activate the yeast faster, and the dough starts rising while you mix the rest. This cuts down on total rising time by 15-20 minutes.
- Don’t Overmix the Dough: Once you add the flour, stop mixing after 2-3 minutes—just until the dough comes together. Overworking it develops the gluten too much, and your bread will turn out dense instead of tender. (I learned this the hard way after kneading for 10 minutes straight.)
- Use Room-Temp Applesauce: Cold applesauce slows yeast activity and can leave pockets of uncooked dough. Let the applesauce sit at room temperature for 10 minutes before mixing—it blends smoother and helps the yeast do its job. (Pro tip: Microwave it for 20 seconds if you’re in a rush, but stir it first.)
Essential equipment for this dish
Mixing Essentials
Start with a stand mixer fitted with the dough hook attachment—this makes handling the sticky dough much easier. I recommend a KitchenAid Artisan Series for its reliable performance, but any mixer with a 3.5-quart bowl works.
If you don't have a mixer, use a wooden spoon and a large mixing bowl—just be prepared for some arm work! For measuring, invest in a digital kitchen scale for precision, especially with the flour and sugar.
A small offset spatula helps scrape every last bit from the bowl. 🥄
Proofing Setup
Proofing requires a warm environment—I use a proofing box (like the Breville Proofing Box) set to 80°F, but a simple solution is a turned-off oven with the light on and a bowl of hot water on the bottom rack.
For shaping, keep flour and a rolling pin nearby to prevent sticking. A bench scraper helps divide the dough cleanly. If you're short on time, a proofing basket (like the Kitchy Proofing Basket) can help contain the dough while it rises. 🌡️
Baking Tools
Two 9x5-inch loaf pans (preferably made of heavy aluminum) are essential for even baking. Grease them well with butter or oil to prevent sticking. A wire cooling rack is a must for proper airflow after baking.
For checking doneness, an instant-read thermometer (like the Thermoworks Thermapen) ensures the bread reaches 190-195°F without overbaking. A pastry brush comes in handy for brushing the tops with milk or egg wash before baking for extra shine. 🔥
Optional Extras
For the filling, a fine grater or mandoline makes quick work of dicing the apples evenly. A small mixing bowl and rubber spatula help combine the filling ingredients smoothly. If you're adding nuts or raisins, a fine-mesh strainer helps drain excess moisture.
For storage, plastic wrap or a bread bag keeps the bread fresh longer, and a sharp bread knife ensures clean slices. 🍎
Budget-Friendly Swaps
No mixer? A dough whisk and strong arms work fine. Skip the proofing box by using a large bowl filled with hot water placed near the dough to create warmth. For loaf pans, lightly greased ceramic or glass baking dishes can substitute in a pinch.
A thermometer isn't mandatory, but you can test doneness by tapping the bottom—it should sound hollow. A spoon or butter knife works for spreading filling if you don’t have a spatula. Every kitchen can handle this! 💰
Nutrition facts
Frequently asked questions
Can I substitute applesauce with something else?
Yes! If you're out of applesauce, use ½ cup mashed ripe banana for moisture, or ¼ cup melted butter plus ¼ cup milk for richness. For a lighter texture, try ½ cup Greek yogurt—it adds protein while keeping the bread tender. Just remember these swaps may slightly alter the flavor profile.
Why did my bread turn out dense instead of fluffy?
Dense bread usually means the yeast didn't activate properly or the dough wasn't kneaded enough. First, check if your yeast was fresh (test it in warm water with sugar—it should foam in 5-10 minutes). Also, ensure you kneaded for the full 5-7 minutes to develop gluten. Another common issue is overproofing—your dough should rise to about 1 inch above the pan in 1-1.5 hours, not longer.
How can I make this bread without a mixer?
No problem! Use a wooden spoon and mix the dough by hand in a large bowl until it comes together. For kneading, turn the dough onto a lightly floured surface and fold it over itself for 10 minutes until smooth and elastic. The dough will be sticky, so wet your hands slightly to prevent sticking. A dough whisk also works well for mixing the wet ingredients first.
Can I add nuts or other mix-ins to the filling?
Try ½ cup chopped walnuts or pecans for crunch, or ½ cup dried cranberries for extra tartness. For a savory twist, add ¼ cup shredded cheddar cheese to the filling. Just be mindful of moisture—if your mix-ins are wet (like fresh fruit), drain them first or reduce the applesauce slightly.
How long does this bread keep fresh?
At room temperature, wrap the loaf tightly in plastic or a bread bag and store for 2-3 days. For longer storage, slice the bread and freeze the slices for up to 3 months. To reheat, wrap slices in a damp paper towel and microwave for 15-20 seconds. The bread will taste best when fresh, but freezing prevents it from drying out.