
Desserts
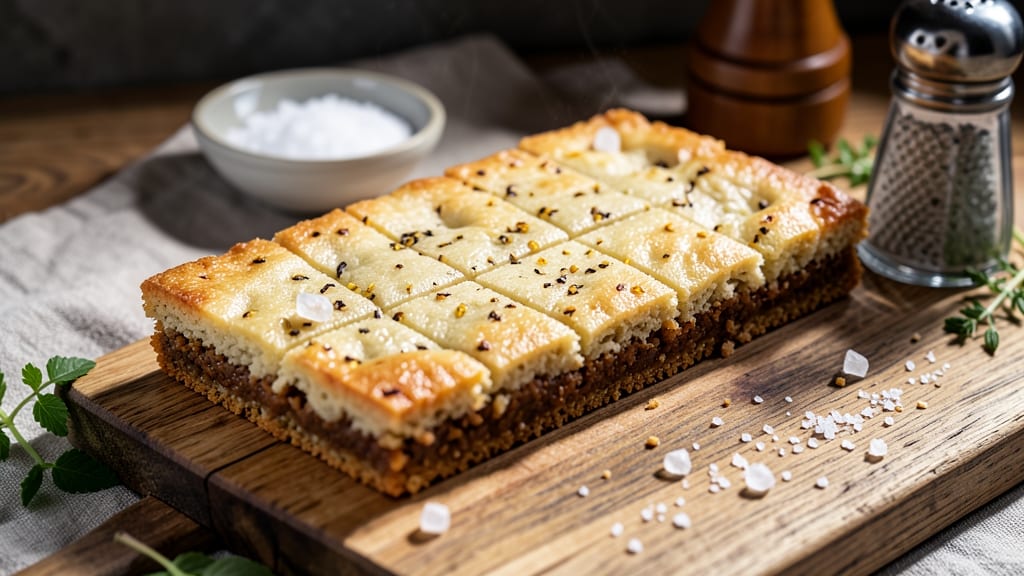
This amazing shortbread cookie recipe delivers the perfect balance of buttery crunch and tender layers that'll have you reaching for seconds. 💛 The secret lies in cold butter and precise mixing—no overworking the dough, just folding it gently to create those signature flaky, melt-in-your-mouth layers.
I’ve been perfecting this recipe for years, and it’s now the one my family begs for during holidays and coffee breaks alike.
The magic happens when cold butter and sugar create tiny pockets of air in the dough, while vanilla adds warmth that makes every bite feel like a cozy hug. No fancy techniques here—just a few simple ingredients mixed just enough to hold together before baking.
The result? Crisp edges, tender centers, and a buttery aroma that fills your kitchen like a warm embrace.
Once baked, these cookies stay fresh for days, perfect for gifting or keeping on hand for spontaneous treats. The texture is what makes them truly special—crunchy enough to satisfy, but tender enough to melt away at the first bite.
Trust me, once you try these, you’ll never go back to store-bought.
Whether you’re baking for a holiday gathering or just craving a classic treat, this recipe delivers foolproof results every time. Let’s get started—your kitchen (and taste buds) will thank you!
Ingredients for amazing shortbread cookie
Six simple ingredients transform into melt-in-your-mouth shortbread cookies with perfect buttery crunch.
| Ingredient | Amount | Notes |
|---|---|---|
| Unsalted Butter 🧈 | 1 cup | Cold, cubed for flakiness |
| Granulated Sugar 🍚 | ½ cup | Superfine preferred for texture |
| Pure Vanilla Extract 🌿 | 1 tbsp | High-quality for best flavor |
| All-Purpose Flour 🌾 | 2 cups | Sifted for light texture |
| Diamond Crystal Kosher Salt 🧂 | ¼ tsp | Fine grain preferred |
| Pure Vanilla Bean Seeds (optional) 🌿 | ½ tsp | For extra vanilla flavor |
The butter is everything here—cold and cubed is non-negotiable. Grab European-style butter like Plugrá or Land O’Lakes European if you can, but regular unsalted works too. The sugar? Superfine makes these cookies extra tender, but if you only have regular granulated, pulse it in a food processor first. Vanilla matters—high-quality pure extract (not imitation) gives that warm, cozy aroma. For the flour, King Arthur or Gold Medal are my go-tos—they bake up consistently light. And that salt? Diamond Crystal is gentler than table salt, so you won’t over-salt your dough.
No superfine sugar? Pulse regular granulated in a food processor for 30 seconds—it’ll work in a pinch. Short on vanilla? Vanilla bean paste adds those little specks of magic, but extract is fine too. The recipe calls for unsalted butter, but if you’re using salted, reduce the kosher salt to 0.125 tsp. For a festive twist, add a pinch of cinnamon or cardamom to the dough. And if you’re feeling fancy, wrap the dough log in parchment before slicing—it keeps everything neat and prevents sticking.
These cookies stay fresh for 5-7 days in an airtight container at room temperature, but honestly? They’ll disappear faster than that. For gifting, wrap individual cookies in parchment and tie with twine—they look gorgeous and stay fresh for 3-4 days. Freeze the dough log (unbaked) for up to 3 months—just slice and bake straight from frozen. Pro tip: Bring to room temp before baking for even results. And if you’re making a big batch, chill the dough between cuts to prevent over-handling.
Why You'll Love This Recipe
- Four-Ingredient Magic: I swear by this—just butter, sugar, vanilla, and flour. No fancy mix-ins, no last-minute scrambling. The dough comes together in minutes, and honestly? That’s half the battle won.
- Buttery Bliss: The moment you bite into one, that rich, cold butter flavor melts into pure satisfaction. No overpowering spices or weird aftertastes—just vanilla-kissed sweetness with that signature shortbread crunch. It’s the kind of cookie that makes you close your eyes.
- Holiday or Snack: I’ve used these for Christmas gifts, afternoon tea, or just because I wanted something sweet at 3 p.m. They freeze like champs, so you can bake a batch and pull them out whenever. (Yes, even on a Tuesday night.)
- No-Waste Joy: A single batch makes 24 cookies, and they last forever—weeks in an airtight container, months frozen. Plus, the ingredients cost pennies. That’s right: buttery, dreamy cookies for less than a fancy coffee. Win.
Step-by-step instructions for buttery vanilla shortbread cookies
Here's how to craft melt-in-your-mouth shortbread with perfect layers and that signature vanilla aroma.
👨🍳 Step 1: Cut and Chill the Butter
Place the 1 cup unsalted butter in a bowl and cut it into ½-inch cubes using a sharp knife. This creates more surface area for the flour to coat, which is key for that signature crumbly texture. Pop the butter cubes into the freezer for 10 minutes—this ensures they stay cold and firm when we mix them with the other ingredients.
Here's the thing—cold butter is non-negotiable for shortbread. If it gets too soft, your cookies will spread too much in the oven instead of holding their shape. I like to press the cubes gently with my fingers to test their firmness before proceeding. They should dent slightly but not flatten completely.
👨🍳 Step 2: Mix the Dry Ingredients
In a separate bowl, whisk together the 2 cups all-purpose flour, 0.5 cup granulated sugar, 0.25 tsp diamond crystal kosher salt, and the 0.5 tsp pure vanilla bean seeds (if using). I always sift the flour first—this prevents lumps and gives the cookies that light, airy texture. The sugar should be evenly distributed, and you should see flecks of vanilla bean throughout the mixture.
This is where the magic happens for that vanilla-kissed flavor. The vanilla bean seeds add an extra layer of complexity that pure extract can't match. If you're using just the extract, add it to the butter mixture in the next step—don't mix it with the dry ingredients or it'll get lost in the flour.
🥘 Step 3: Combine Wet and Dry Ingredients
Remove the cold butter cubes from the freezer and add them to the dry ingredients. Using your fingers or a pastry cutter, work the butter into the flour mixture until you reach a crumbly, sandy consistency. This should take about 3-4 minutes of mixing—just until the butter is completely coated with flour but hasn't formed a dough yet.
Now add the 1 tbsp pure vanilla extract and mix it in thoroughly. The mixture should look like wet sand with no visible butter pieces. If you press the mixture together, it should hold its shape but still feel crumbly. This is the perfect texture for shortbread—it should be firm enough to handle but still break apart easily.
🔥 Step 4: Shape and Chill the Dough
Press the dough mixture into a 1-inch thick disk on a piece of parchment paper. I like to use my hands to gently press it down evenly—this ensures the cookies bake uniformly. Wrap the dough tightly in plastic wrap and refrigerate for at least 1 hour (or up to 24 hours). Chilling firms up the butter, which prevents the cookies from spreading too much in the oven.
This resting step is crucial—I've learned the hard way that skipping it leads to sad, flat shortbread. The longer you chill the dough, the better the flavor develops. If you're short on time, at least 30 minutes in the freezer will work in a pinch, but overnight is ideal for maximum flavor.
🔪 Step 5: Cut and Bake to Golden Perfection
Preheat your oven to 325°F and line two baking sheets with parchment paper. Remove the chilled dough from the refrigerator and cut it into 2-inch rounds using a round cookie cutter or glass. Place the cut cookies 1 inch apart on the prepared baking sheets—they won't spread much, but they do need some room to breathe.
Bake for 20-25 minutes until the edges are light golden brown and the centers look just slightly underdone. The cookies should be firm to the touch but still soft in the middle. Here's the secret: I like to rotate the baking sheets halfway through baking to ensure even color. Let the cookies cool on the baking sheets for 5 minutes before transferring to a wire rack to cool completely.
You'll know they're perfect when they've cooled completely and developed that beautiful buttery crunch. The vanilla flavor should be subtle but noticeable in every bite, with layers of buttery richness and delicate sweetness. These cookies will keep well in an airtight container for up to 5 days, though they rarely last that long in my house!
Pro Tips For Making Amazing Shortbread Cookie
- Chill the Dough Properly: I learned this the hard way—skipping the fridge leads to sad, greasy cookies. Wrap the dough in plastic and refrigerate for at least 2 hours (overnight is better), then let it sit at room temp for 10 minutes before rolling. This keeps the butter firm enough to hold shape without cracking.
- Use Cold Butter, No Exceptions: Cut the unsalted butter into cubes and freeze it for 10 minutes first—this makes all the difference. Cold butter creates flaky layers, while room-temp butter turns shortbread into a dense brick. Work fast once it’s in the bowl, but don’t let it warm up.
- Salt the Butter, Not Just the Dough: Diamond Crystal kosher salt is less intense, so add a pinch (about ¼ tsp) directly to the butter before mixing. This balances the sweetness more evenly than sprinkling it in later. Trust me, your cookies will taste more cohesive—no aftertaste of sugar overload.
- Press Cookies Lightly, Not Hard: Use a glass or measuring cup to gently press the dough into the pan—just enough to flatten without compacting it. Over-pressing makes shortbread dense. Space them 1 inch apart; they won’t spread much, but they’ll need room to rise slightly in the oven.
Common mistakes when making this recipe
Overmixing the Dough
I’ve ruined more shortbread than I’d admit by overmixing the dough—turning it into a sticky, dense mess instead of the perfect crumbly texture we want. The key is to stop mixing the moment the butter is fully incorporated and the mixture resembles wet sand.
Any more work, and you’ll develop the gluten, which leads to tough, chewy cookies instead of the tender, melt-in-your-mouth layers we’re after. 💛
Skipping the Chill
This is a non-negotiable step, folks. If you skip chilling the dough, the butter will melt too quickly in the oven, causing your cookies to spread into flat, sad discs rather than holding their shape.
I’ve learned the hard way—always chill the dough for at least 1 hour (or overnight if you can). Pro tip: If you’re in a rush, pop the dough in the freezer for 30 minutes—it’ll still work in a pinch.
Using Warm Butter
Cold butter is the secret weapon in shortbread—it creates those beautiful flaky layers. If your butter is too soft or even melted, your cookies will lose their structure and turn out greasy or cakey.
Always cut your butter into ½-inch cubes and freeze it for 10 minutes before mixing. Test the firmness by pressing a cube with your finger—it should dent slightly but not flatten completely.
Overcrowding the Baking Sheet
Shortbread cookies might not spread much, but they still need room to breathe. If you place them too close together, they’ll bake unevenly and potentially steam, leading to soggy bottoms.
I like to space mine 1 inch apart on the baking sheet. This ensures even baking and that perfect golden-brown edge we’re after. 🔥
Baking at the Wrong Temperature
The oven temperature is critical—too high, and your cookies will burn before they’re fully baked; too low, and they’ll stay pale and doughy. 325°F is the sweet spot for even, golden-brown cookies with tender centers.
Use an oven thermometer to double-check your oven’s accuracy—many home ovens run hot or cold, and this can make a huge difference in the final result.
Not Cooling Properly
Freshly baked shortbread is tempting, but resist the urge to dig in right away! Let them cool on the baking sheet for 5 minutes before transferring to a wire rack. This helps them set properly and develop that beautiful buttery crunch.
If you move them too soon, they’ll be soft and greasy. Patience here pays off—trust me, the wait is worth it for that perfect texture. ✨
Nutrition facts
Frequently asked questions
Can I make these shortbread cookies gluten-free?
Yes, but with some adjustments! Replace the all-purpose flour with a 1:1 gluten-free baking flour blend (like Bob's Red Mill or King Arthur) and add 1 tsp xanthan gum to help bind the dough. Chill the dough longer (2 hours) since gluten-free flours behave differently. The texture will be slightly denser but still delicious.
Why do my shortbread cookies turn out greasy?
Greasy cookies usually mean the butter melted too soon. Always use cold butter cubes and chill the dough thoroughly. Another tip: Don't overmix—just combine until crumbly. If your kitchen is warm, try baking at 300°F instead of 325°F to slow butter melting.
How do I store these cookies to keep them fresh?
For maximum freshness, store in an airtight container at room temperature for 5-7 days. To extend shelf life, freeze the baked cookies (not dough) for up to 3 months. For gifting, wrap individually in parchment and tie with twine—they'll stay fresh for 3-4 days at room temperature.
Can I add chocolate chips to this recipe?
Fold in ½ cup chocolate chips (or chopped chocolate) when combining wet/dry ingredients. Use high-quality chocolate (70% dark or semi-sweet) for best flavor. For a fancy touch, sprinkle extra chips on top before baking. Just note: chocolate melts faster, so bake at 300°F for 18-20 minutes instead.
What's the best way to cut perfect shortbread rounds?
Use a 2-inch round cutter or a glass of that size for clean edges. Dip the cutter in flour before each use to prevent sticking. For free-form shapes, use a sharp knife and dip it in flour between cuts. Press firmly but don't twist—this creates clean breaks. Pro tip: Chill the dough for 30 minutes** before cutting for easier handling.