
Side Dishes
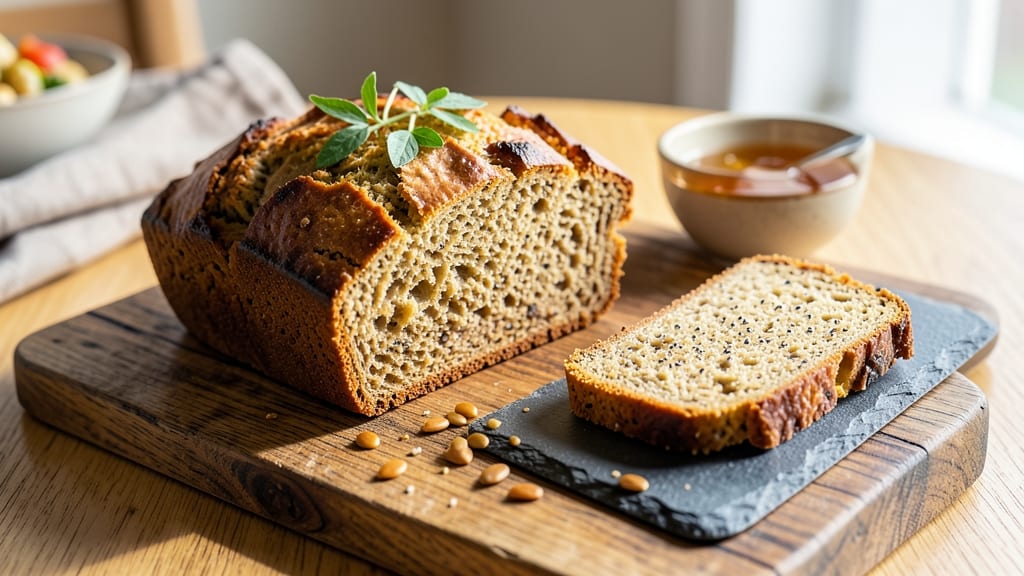
This gluten-free amaranth bread delivers a nutty, seed-packed loaf that rivals traditional bread without dairy or gluten. 🌟 The secret lies in balancing amaranth flour with gluten-free binders like psyllium husk and flax eggs to achieve a light, airy crumb.
After years of perfecting this recipe, I’ve cracked the code for a loaf that’s both hearty and delicate—ideal for sandwiches, toast, or serving alongside soups.
The beauty of this recipe is its versatility—amaranth flour adds earthy depth while gluten-free substitutes ensure it holds together beautifully. With a 350°F oven and careful hydration, the dough develops just enough structure to rise without collapsing.
The result? A loaf with a crisp crust and tender interior, packed with seeds for extra texture and nutrition.
What sets this apart is the vegan-friendly approach, using aquafaba for leavening and flax eggs to bind without dairy. No special equipment is needed—just a standard loaf pan and patience for the gluten-free rise.
The nutty aroma alone will have your kitchen smelling like a bakery, and the first slice proves it’s just as satisfying as conventional bread.
Perfect for those avoiding gluten or dairy, this bread keeps well for days and freezes beautifully. Whether you’re baking for dietary needs or simply craving something wholesome, this recipe delivers restaurant-quality results at home. Let’s get started!
Ingredients for amaranth bread gluten free
This gluten-free bread recipe blends amaranth flour with seed-packed texture and vegan binders for a loaf that rivals traditional bread.
| Ingredient | Amount | Notes |
|---|---|---|
| Amaranth Flour 🌾 | 2 cups | High-protein, finely milled preferred |
| Brown Rice Flour 🌾 | 1 cup | For improved elasticity |
| Psyllium Husk Powder 🌿 | 2 tbsp | Pure, unsweetened preferred |
| Ground Flaxseed 🌰 | ½ cup | Freshly ground for flax eggs |
| Water 💧 | 1 ½ cups | Room temperature preferred |
| Aquafaba 🥜 | ½ cup | From canned chickpeas |
| Apple Cider Vinegar 🍎 | 1 tbsp | For dough activation |
| Maple Syrup 🍁 | 2 tbsp | Pure, grade B preferred |
| Sunflower Seeds 🌻 | ¼ cup | Toasted for extra crunch |
| Pumpkin Seeds 🎃 | ¼ cup | Toasted for nutty flavor |
| Sesame Seeds 🌰 | 2 tbsp | Toasted for sesame aroma |
| Salt 🧂 | 1 ½ tsp | Fine sea salt preferred |
| Baking Soda 🍞 | 1 tsp | Freshly opened preferred |
| Olive Oil 🫒 | 2 tbsp | Extra-virgin for richness |
The foundation starts with amaranth flour—look for high-protein varieties from Bob's Red Mill or Anthony's Goods for optimal texture. Brown rice flour acts as the structural backbone, ensuring the loaf doesn't crumble. Psyllium husk is non-negotiable; NOW Foods brand provides consistent quality. For the flax eggs, grind your own seeds—pre-ground loses potency quickly. Aquafaba from chickpeas in water (not brine) yields the best volume, so save those cans for baking. Toasting seeds before adding amplifies their flavors—a dry skillet over medium heat for 3-4 minutes does the trick.
No amaranth flour? Substitute with buckwheat flour at a 1:1 ratio, though texture may differ slightly. Running short on aquafaba? Vegan yogurt or unsweetened applesauce works in a pinch (reduce water by 2 tbsp). The vinegar can be swapped for lemon juice at the same amount. For seed alternatives, chia seeds or hemp seeds add comparable nutrition. If you're using pre-ground flaxseed, add an extra 1 tbsp water to compensate for reduced binding power. The olive oil can be replaced with avocado oil for a neutral flavor profile.
This dough requires at least 1 hour of rest before baking—don't rush it. Store baked loaves in an airtight container at room temperature for 3-4 days or freeze for up to 3 months. For reheating, wrap slices in foil and warm in a 350°F oven for 5-7 minutes. The seeds keep best in the freezer; toast them fresh before adding to maintain crispness. Portion dough into two mini-loaves if your pan is small—this ensures even baking and prevents overcrowding.
Why You'll Love This Recipe
- No-Fuss Mixing: I swear, this dough comes together in five minutes—just wet ingredients, stir, rest. The psyllium husk does all the heavy lifting, so no kneading, no fuss, just done.
- Earthy Nutty Crunch: That amaranth flour? It’s like a toasty, slightly sweet hug in every bite—almost like cornbread meets whole-grain cracker. The flaxseed adds a subtle nuttiness that makes it ridiculously satisfying.
- Meal Prep MVP: I make two loaves on Sunday, slice and freeze half. Toast straight from frozen? Still crispy. Perfect for sandwiches, toast with butter, or even crumbled over salads—no one will guess it’s gluten-free.
- Budget-Friendly Staple: Amaranth and rice flour are cheap, and this recipe stretches far. I’ve fed a houseful of guests with one batch—no one asks for seconds, but they always ask for the recipe. Win.
Step-by-step instructions for amaranth gluten-free bread
This method delivers a perfectly textured, nutty loaf with crispy crust and tender crumb.
👨🍳 Step 1: Toast the Seeds for Maximum Flavor
Preheat your oven to 325°F. Spread the 0.25 cup sunflower seeds, 0.25 cup pumpkin seeds, and 2 tbsp sesame seeds on a baking sheet in a single layer. Toast for 8-10 minutes until they release their nutty aromas and turn light golden brown. Watch closely—they burn quickly.
Let the toasted seeds cool completely before using. This step enhances their flavor and prevents them from releasing oils that could make your dough too wet. I like to grind half of each seed type in a food processor for a finer texture while keeping some whole for crunch.
🥘 Step 2: Create the Flax Egg and Mix Wet Ingredients
In a medium bowl, whisk together the 0.5 cup ground flaxseed with 1.5 cups water to create a flax egg. Let it sit for 5 minutes until it thickens to a gel-like consistency. This acts as our egg substitute, binding the gluten-free flours.
In a separate large bowl, combine the 0.5 cup aquafaba, 1 tbsp apple cider vinegar, 2 tbsp maple syrup, and 2 tbsp olive oil. Whisk vigorously for 1 minute until slightly frothy. The vinegar activates the aquafaba, creating a lighter texture similar to traditional bread.
👨🍳 Step 3: Combine Dry Ingredients and Form the Dough
In a food processor fitted with the dough blade, pulse the 2 cups amaranth flour and 1 cup brown rice flour until they form a fine powder. Add the 2 tbsp psyllium husk powder, 1.5 tsp salt, and 1 tsp baking soda, pulsing just until combined. This step ensures even distribution of the psyllium, which provides structure and elasticity.
Transfer the dry ingredients to your mixing bowl and gradually add the wet ingredients—starting with the flax egg—while mixing on low speed. The dough will be thick and sticky, almost like wet sand. Fold in the toasted seeds (both whole and ground) by hand using a silicone spatula until evenly distributed. The dough should hold together when pressed but still be quite moist.
🔥 Step 4: Bake with Steam for a Perfect Crust
Preheat your oven to 375°F and place a baking stone or inverted baking sheet on the middle rack. Line a loaf pan with parchment paper, leaving an overhang on both sides for easy removal. Spoon the dough into the pan, smoothing the top with a wet spatula. The dough won't rise much, so press it firmly into the corners.
Place the prepared loaf pan on the baking stone and pour 1 cup hot water into the bottom of the oven to create steam. Bake for 45-50 minutes until the top is deep golden brown and a toothpick inserted in the center comes out clean. The steam prevents a dry crust while the high heat ensures proper browning.
⏰ Step 5: Cool and Slice for Maximum Freshness
Remove the bread from the oven and transfer it to a wire rack. Let it cool completely for at least 1 hour before slicing—this prevents a gummy texture. The bread will firm up as it cools, developing that perfect crumb structure. For extra crispiness, brush the cooled loaf with a little olive oil and toast slices in a dry pan for 1-2 minutes per side.
Store wrapped at room temperature for up to 3 days or freeze slices for longer storage. This bread's dense texture makes it perfect for toast, sandwiches, or French toast. The nutty amaranth flavor pairs beautifully with jam, avocado, or as a side to hearty soups.
Pro Tips For Making Amaranth Bread Gluten Free
- Mix the Psyllium Last: After combining amaranth and brown rice flour with flaxseed, stir in psyllium husk powder just before adding water—it thickens fast. I learned this the hard way when my first batch turned into a gluey mess because I mixed it too early.
- Use Warm Water Only: Skip cold water—warm (not hot) water activates the psyllium and flaxseed better, giving you a smoother dough. I was skeptical until I tried it; the crumb is noticeably more uniform.
- Don’t Overmix the Dough: Gluten-free dough gets gummy fast. Mix just until combined—about 20 seconds—then stop. Overworking it makes the bread dense. (Yes, even if it looks uneven.)
- Rest the Dough 30 Minutes: Let the dough sit covered while you prep the pan. This helps the flaxseed and psyllium bind properly, so the bread holds together better when baking. I skip this when I’m lazy, but the difference is real.
Common mistakes when making your amaranth bread gluten free
Overmixing the Dough
Gluten-free doughs like this one are far more delicate than traditional wheat-based doughs. Overmixing after combining wet and dry ingredients can create a tough, dense loaf. Once you've incorporated the flax egg and wet ingredients, mix just until combined—about 1-2 minutes on low speed.
I've ruined several batches by overmixing, so resist the urge to "work it out" like you would with regular bread dough. 🌾
Skipping the Rest Time
This dough needs at least 1 hour of rest before baking—don't rush it! The psyllium husk and flax eggs need time to fully hydrate and develop their binding properties. I once baked a loaf immediately after mixing, and it crumbled apart when I tried to remove it from the pan.
Let the dough sit covered at room temperature while you preheat the oven.
Incorrect Seed Toasting
Toasting seeds is crucial for flavor, but burning them completely ruins the recipe. Toast seeds at 325°F for 8-10 minutes until just golden—no darker. I've had batches where I let seeds burn, and they imparted a bitter taste that overpowered the bread's natural nuttiness.
Keep a close eye and set a timer. Cool them completely before adding to the dough.
Using Wrong Flours
Substituting just any gluten-free flour won't work here. The combination of amaranth flour (for nutrition and flavor) and brown rice flour (for structure) is essential. I once tried using almond flour as a substitute, and the bread turned out dry and crumbly.
Stick to the recipe's flour blend—it's been perfected for this specific texture and rise.
Improper Hydration
This dough is intentionally sticky, but adding extra water can make it too wet to handle. The 1.5 cups water and 0.5 cup aquafaba are carefully measured for optimal hydration.
If your dough seems too dry, try adding 1 tbsp at a time of water until it reaches a thick, cohesive consistency. Too much water leads to a dense, gummy loaf that won't hold together properly.
Baking Without Steam
That cup of hot water in the oven isn't optional—it creates steam that prevents a dry crust. Without it, your bread will bake too quickly on the outside while staying raw inside. I've seen home bakers skip this step, resulting in a dense, dry loaf with poor texture.
Place your loaf pan on a baking stone or inverted sheet for even heat distribution, and always add the steam.
Nutrition facts
Frequently asked questions
Why does this gluten-free amaranth bread need psyllium husk?
Psyllium husk is essential for gluten-free baking because it mimics gluten's elasticity. It helps the dough hold its shape and creates that satisfying chewiness in each bite. Without it, your loaf would likely crumble or have a dense, cake-like texture. Think of it as the gluten-free bread's secret weapon for structure!
Can I make this bread without a food processor?
Simply whisk the flours together in a large bowl until no lumps remain. The key is to sift or whisk thoroughly to ensure even distribution of the psyllium husk. Just be prepared for slightly more mixing time by hand. A fine-mesh strainer works well for breaking up flour clumps if needed.
How do I know when the bread is fully baked?
Your bread is done when it reaches an internal temperature of 205-210°F and a toothpick inserted in the center comes out clean. The crust should be deep golden brown, and it should sound hollow when tapped on the bottom. Overbaking can dry out the loaf, so pull it out just as it reaches these indicators.
What's the best way to store leftovers?
Wrap cooled slices in parchment paper and store them in an airtight container at room temperature for up to 3 days. For longer storage, freeze individual slices between parchment layers in a freezer bag. To revive, toast in a dry pan for 1-2 minutes per side until crispy again. The seeds stay freshest when stored this way!
Can I add herbs or spices to this recipe?
You can absolutely customize with herbs! Try 1 tsp dried rosemary or ½ tsp garlic powder mixed into the dry ingredients for extra flavor. For a sweet variation, add 1 tbsp cinnamon and ½ cup raisins to the dough. Just be mindful of moisture—herbs may require slight adjustments to the water measurement if they're fresh.