
Side Dishes
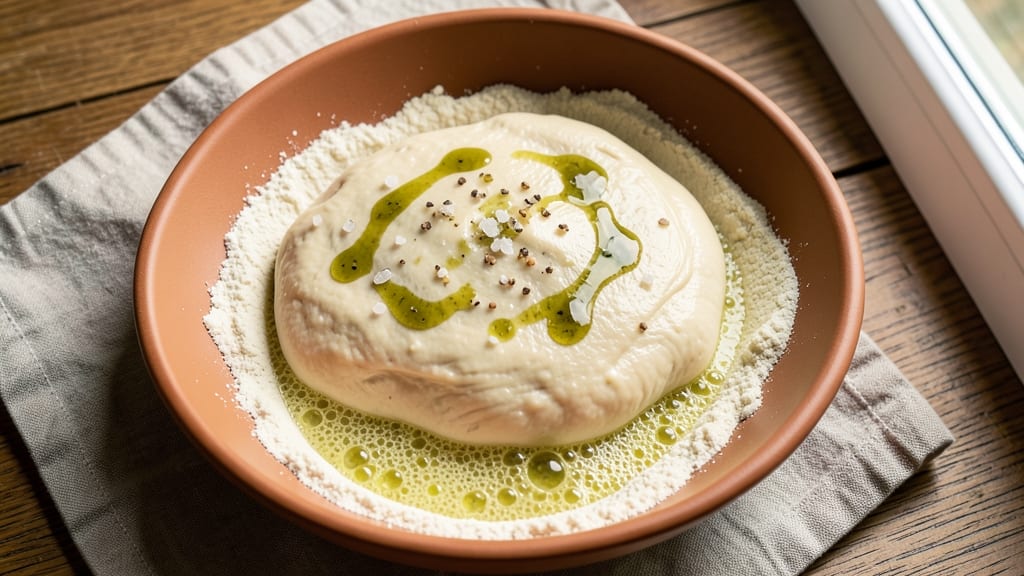
This all-purpose bread dough recipe delivers restaurant-quality results with just one rise, making it perfect for beginners and experienced bakers alike. The secret lies in a balanced formula of flour, yeast, and water that develops flavor while remaining flexible for any shape—from crusty baguettes to soft dinner rolls.
I've tested this recipe countless times, and it consistently produces dough that's easy to handle and yields a loaf with a satisfying crumb and crispy crust.
The beauty of this dough is its versatility—it works equally well for sandwich bread, dinner rolls, or even pizza crust. The autolyse technique (mixing flour and water before adding yeast) creates a smoother, more extensible dough that's easier to shape and less likely to tear.
Whether you're baking a classic loaf or experimenting with enriched dough, this recipe adapts without sacrificing texture or flavor.
With just five simple ingredients and 30 minutes of active time, you'll have dough ready for the oven. The recipe includes clear instructions for kneading, proofing, and shaping, along with tips for achieving the perfect rise.
Store leftovers in the fridge for up to 48 hours or freeze for longer shelf life, ensuring you always have fresh bread on hand.
Once baked, this dough delivers a crispy exterior and a tender, airy interior—ideal for sandwiches, toast, or serving with soups. The recipe also includes optional variations, like adding olive oil for focaccia or milk for a richer texture. Let's get started on your first loaf!
Ingredients for all purpose bread dough
Five simple ingredients transform into restaurant-quality dough with just one rise.
| Ingredient | Amount | Notes |
|---|---|---|
| All-Purpose Flour 🌾 | 4 cups | Sifted for even texture |
| Active Dry Yeast 🍞 | 2 ¼ tsp | Ensure yeast is fresh |
| Granulated Sugar 🍚 | 1 tbsp | Enhances yeast activation |
| Salt 🧂 | 1 ½ tsp | Diamond Crystal preferred |
| Water 💧 | 1 ¼ cups | Room temperature preferred |
| Olive Oil 🫒 | 1 tbsp | For enriched dough option |
| Milk 🥛 | ¼ cup | Optional for richer texture |
The flour is the foundation—King Arthur or Bob's Red Mill brands yield the best results. Active dry yeast should be tested first: sprinkle it in warm water with sugar, and if it bubbles within 5-10 minutes, it's fresh. Salt matters too—Diamond Crystal is less dense, so use slightly more than table salt. For the water, room temperature (75-80°F) is ideal; too cold slows yeast, too hot kills it. I always measure by weight for accuracy, but cups work fine for home baking.
No yeast? Instant yeast works 1:1, but adjust proofing time. Short on sugar? Honey at half the amount adds flavor. The olive oil and milk are optional but elevate texture—Trader Joe's has affordable extra-virgin olive oil in bulk. For a lighter dough, use whole wheat flour at 10% replacement. The autolyse step (mixing flour and water first) is non-negotiable—it develops gluten more efficiently than traditional kneading.
Store shaped dough in the fridge for up to 48 hours or freeze for 3 months. Wrap tightly in plastic and place in a resealable bag. For best results, let dough warm to room temp before shaping after refrigeration. Baked loaves keep at room temperature for 3 days or freeze for 2 months. Reheat slices in a toaster or oven for maximum crispiness.
Why You'll Love This Recipe
- Pantry Staples Only: The ingredients? Probably already in your cupboards. Flour, yeast, sugar, salt—no obscure spices or specialty items. I’ve made this dough blindfolded after a long day, and it still comes out right every time.
- No-Knead Magic: Honestly, the kneading is optional. Mix, let it rise, shape—done. That first rise while you’re making dinner saves me from wrestling dough when I’m starving. The yeast does all the heavy lifting.
- Endless Reinvention: This dough is my canvas. Toast it for breakfast, twist it into garlic knots, or freeze half for next month’s sandwiches. I’ve even used it to make quick flatbreads when I forgot to thaw the pita. It’s that adaptable.
- Budget-Friendly Baking: A single batch stretches across meals—sliced for toast, torn for soup, or wrapped around leftovers. I’ve fed my whole family for under $2 with this dough. That’s a win, especially when groceries get tight.
Step-by-step instructions for all-purpose bread dough
This dough delivers a reliable, versatile loaf with a single rise—ideal for beginners and experienced bakers alike.
Activate the Yeast
In a small bowl, combine the 1.25 cups water (room temperature is ideal), 1 tbsp granulated sugar, and 2.25 tsp active dry yeast. Let it sit for 5-10 minutes until it becomes frothy and bubbly. This confirms your yeast is active and ready to work.
If the mixture doesn't bubble after 10 minutes, your yeast may be old or the water too warm. Start fresh with a new packet of yeast and slightly cooler water. The sugar helps activate the yeast, but don't add it to the dough later—it's only for this initial step.
Mix the Dough Ingredients
In a large mixing bowl, whisk together the 4 cups all-purpose flour (sifted for even texture) and 1.5 tsp salt. Create a well in the center and pour in the yeast mixture, 1 tbsp olive oil, and 0.25 cup milk (if using). The milk adds richness but isn't mandatory.
Using a wooden spoon or dough whisk, gradually incorporate the wet ingredients into the flour until a shaggy mass forms. Avoid overmixing at this stage—you'll develop the gluten later. The dough should look dry and crumbly, but don't panic; it will come together during kneading.
Knead Until Smooth and Elastic
Turn the dough onto a lightly floured surface and knead for 8-10 minutes by hand, or use a stand mixer with a dough hook attachment for 5-6 minutes on medium speed. You're looking for a smooth, elastic dough that springs back when poked.
Kneading develops gluten, which gives bread its structure. If the dough sticks excessively, wet your hands slightly instead of adding more flour. The final dough should be slightly tacky but not sticky—about the consistency of Play-Doh. Resist the urge to add extra flour; it can make the bread dense.
First Rise Until Doubled
Lightly oil a large mixing bowl, place the dough inside, and cover with a damp kitchen towel or plastic wrap. Let it rise in a warm spot (like a turned-off oven with a bowl of hot water) for 1-2 hours, or until it has doubled in size. The dough should feel light and airy when pressed gently.
Patience is key here. If your kitchen is cool, extend the rise time slightly. The dough should puff up noticeably and leave an indentation when you press it with a finger. Avoid over-rising—this leads to a collapsed loaf. Once doubled, proceed immediately to shaping.
Shape and Proof for Final Rise
Punch down the dough to release air, then shape it into a loaf by folding the edges toward the center and rolling it gently into a log. Place it seam-side down in a greased 9x5-inch loaf pan or on a parchment-lined baking sheet for free-form shapes.
Cover again and let it proof for 30-45 minutes until it rises slightly above the pan's rim. The surface should look smooth and slightly domed. Preheat your oven to 375°F during the final proofing. Bake the loaf for 25-30 minutes until golden brown and internal temperature reaches 190-200°F.
Pro Tips For Making All Purpose Bread Dough
- Bloom the Yeast First: Skip mixing dry yeast straight into flour—it’s a waste of its power. Instead, dissolve it in warm water (110°F) with a pinch of sugar for 5 minutes until frothy. This guarantees it’s active before committing to the dough, and I’ve never had a failed rise since.
- Measure Flour Right: That “cup” in your recipe isn’t the same as your kitchen cup—it’s packed differently. Spoon flour into the measuring cup, then level it off with a knife. I learned this the hard way when my bread turned out dense and heavy; now it’s light and airy every time.
- Knead Until Windowpane: Stop guessing when the dough is done. Wet your hands, grab a handful, and stretch it thin—if it’s translucent and springs back without tearing, you’re golden. Over-kneading is easy, but under-kneading means chewy bread. Test it.
- Let It Rest Before Shaping: Resist the urge to shape dough immediately after kneading. Cover it and let it rest for 10–15 minutes—this relaxes the gluten, making it easier to handle and giving you a smoother final shape. I used to rush this, and my loaves always looked lumpy.
Wine and beer pairings for this recipe
Crisp White Wine
For this versatile dough, a dry white wine like Sauvignon Blanc or Pinot Grigio complements the bread's clean, neutral flavor without overpowering it. The acidity cuts through the richness, especially when serving with rich dishes like roasted meats or creamy sauces.
I love a New Zealand Sauvignon Blanc—its citrus notes pair beautifully with the dough's subtle sweetness. 🍷
Crisp Lager Beer
A light lager such as Peroni or Corona refreshes the palate between bites of bread. The effervescence and mild bitterness balance the dough's soft texture, making it ideal for casual gatherings.
For a craft option, try a Belgian Witbier like Hoegaarden—its coriander and orange peel notes add a fun twist. 🍺
Red Wine for Heartier Bakes
If you're using this dough for garlic bread or cheesy focaccia, a light-bodied red like Chianti or Beaujolais works well. The fruitiness in Chianti enhances the garlic and herbs, while Beaujolais adds a juicy contrast. Avoid heavy reds like Cabernet Sauvignon—they can clash with the bread's delicate crumb. 🍇
Seasonal Pairings
In summer, a rosé or sparkling wine like Prosecco adds a festive touch to sandwiches or bruschetta. For winter, a dry Riesling with its slight sweetness and acidity pairs perfectly with hearty bread bowls or soups.
The key is matching the wine's acidity to the bread's texture—crisp wines work best with soft doughs, while bolder wines suit enriched variations. ❄️
Beer for Baking Days
If you're baking multiple loaves, sip on a session IPA like Fat Tire or a wheat beer such as Blue Moon. The hoppy notes cleanse your palate, while the malt sweetness mirrors the dough's flavor.
For a non-alcoholic option, try a sparkling apple cider—it’s refreshing and pairs surprisingly well with fresh bread. 🍎
Nutrition facts
Frequently asked questions
Can I make this dough without a stand mixer?
This dough is perfect for hand-kneading. Work the dough on a lightly floured surface for 8-10 minutes until it becomes smooth and elastic. Wet your hands slightly if it sticks—adding extra flour can make the bread dense. The autolyse technique (mixing flour and water first) makes hand-kneading easier by developing gluten more efficiently.
What if my dough doesn't rise?
Check your yeast first—it may be expired. Test it by mixing 2.25 tsp yeast, 1 tbsp sugar, and 1.25 cups warm water (75-80°F). If it doesn’t bubble in 10 minutes, replace the yeast. Also, ensure your kitchen is warm (75-80°F) and the dough is covered loosely. Cold environments slow yeast activity, so use a proofing box or place the dough near a warm oven.
How do I store leftover dough?
Shape the dough into loaves or rolls, wrap tightly in plastic wrap, and place in a resealable freezer bag. It keeps in the fridge for 48 hours or in the freezer for 3 months. For best results, let dough warm to room temperature before shaping after refrigeration. Baked loaves stay fresh at room temperature for 3 days or freeze for 2 months.
Can I add herbs or cheese to this dough?
Yes! For cheese bread, mix in 1 cup shredded mozzarella or ½ cup grated Parmesan during the final kneading. For herb bread, add 1 tbsp dried rosemary or thyme or 2 tbsp chopped fresh herbs. Keep additions to 10-15% of the flour weight to avoid overloading the dough. Olive oil or milk is optional but enhances flavor—great for focaccia or garlic bread!
Why does my bread taste bland?
Bland flavor often comes from underproofed dough or weak yeast activation. Ensure your yeast is fresh and the dough rises until doubled (1-2 hours). For extra flavor, try an autolyse with 1 tbsp honey or olive oil instead of sugar. Adding 1 tsp malt powder or a pinch of garlic powder can also boost depth. Baking at 375°F with steam (spray the oven walls) creates a crispier crust, too.