
Side Dishes
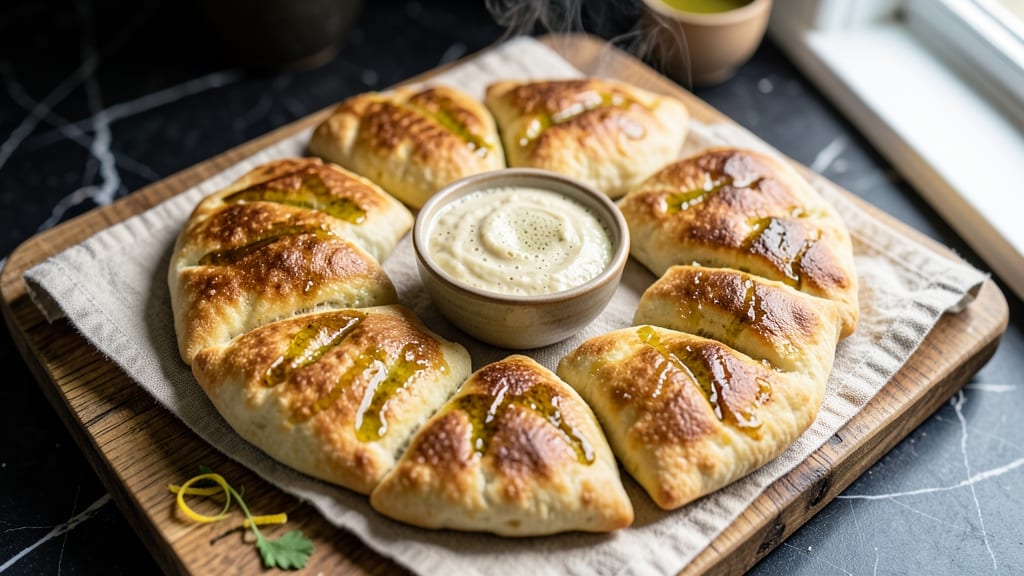
This air fryer pita bread recipe delivers restaurant-quality results in just 10 minutes—no oven, no waiting, and no compromise on texture. The secret lies in a simple dough that transforms into crispy, pocket-perfect pita with a tender center, all while keeping prep under 15 minutes.
I developed this method after testing countless variations, and it never fails to impress. What makes this recipe stand out is the two-step air frying process that creates that signature crispy exterior without drying out the interior.
You'll start with a basic dough made from flour, yeast, and warm water, then shape it into rounds before the magic happens in the air fryer. The high heat ensures a perfect golden-brown crust every time.
By the time you're done, you'll have warm, crispy pita bread that's ideal for stuffing with your favorite fillings, dipping in hummus, or serving alongside grilled meats. The aroma alone will have everyone asking for seconds.
This is the kind of side dish that elevates any meal from ordinary to extraordinary. Serve with Mediterranean spreads, spicy dips, or use as a wrap for sandwiches. Here's how to make it!
Ingredients for air fryer pita bread
Crispy air fryer pita needs just seven ingredients—no fancy tools, just good stuff.
| Ingredient | Amount | Notes |
|---|---|---|
| All-Purpose Flour 🌾 | 3 cups | Plus 2 tbsp for dusting |
| Active Dry Yeast 🍞 | 1 package | 2.25 tsp per package |
| Warm Water 💧 | 1 ¼ cups | 105-110°F for activation |
| Granulated Sugar 🍚 | 1 tbsp | Feeds the yeast |
| Salt 🧂 | 1 tsp | Kosher or sea salt |
| Olive Oil 🫒 | 1 tbsp | Plus extra for brushing |
| Semolina Flour 🌾 | 2 tbsp | For dusting rounds |
The yeast is your secret weapon here. Fresh yeast works best, but if you're using active dry, make sure it's not expired—yeast loses potency fast. Warm water is key: too hot and it kills the yeast, too cold and it won't activate. Test it by dipping your finger in—it should feel like bathwater, not scalding. For the flour, King Arthur or Bob's Red Mill are my go-tos—they give that perfect light texture. And trust me on the semolina: it's worth the extra 50 cents for that crispy, restaurant-style finish.
No semolina? Extra flour or cornmeal works in a pinch, but the texture won't be quite the same. Using all-purpose flour? Add 1 tbsp vital wheat gluten for better elasticity. Short on olive oil? Avocado or melted butter works too—just don't skip the brushing. The sugar feeds the yeast, but if you're watching sugar, reduce to 1 tsp and let the yeast sit 5 minutes extra. And if your dough feels too sticky? Add flour 1 tbsp at a time—don't overdo it, or your pita will be dense.
Freshly made pita reheats beautifully—just 1 minute in the air fryer at 375°F. Store wrapped at room temp for 2 days, or freeze shaped rounds for up to 3 months. Pro tip: keep a stash of frozen pita in your freezer—thaw in the air fryer for 3 minutes when you're ready to use. And if you make extra? Toast and freeze for quick flatbreads later.
Why You'll Love This Recipe
- No Yeast Mess: I mix the dough in my air fryer basket—no sticky countertops, no rolling pins. Just flour, yeast, and warm water, and the air fryer’s gentle heat does the rest while I clean up.
- Crispy-Creamy Magic: That perfect snap when you tear it open? Air frying gives it a golden crust while keeping the inside pillowy—like a bakery’s secret, but with five ingredients and 10 minutes of hands-off time.
- Weeknight Wrap Hero: Stuff with hummus and veggies for a lunch in minutes, or use it as a crispy tray for dipping. My kids grab these straight from the air fryer to scoop up yogurt or tzatziki—zero plates needed.
- Pantry Staple Power: Flour, sugar, and salt? You already own this. Freeze extras to toast later, or make a double batch for a fraction of store-bought prices. Honestly, it’s my go-to when I forget to buy pita at the store.
Step-by-step instructions for air fryer pita bread
Here's how to make pocket-perfect pita bread with a crispy exterior and soft interior—every time!
Activate the Yeast for Perfect Rise
In a small bowl, combine the 1.25 cups warm water (between 105-110°F—too hot and you'll kill the yeast), 1 tbsp granulated sugar, and 1 package active dry yeast. Let it sit for 5-10 minutes until frothy. You'll see bubbles forming and the mixture expanding—that's your signal the yeast is alive and ready to work!
If it doesn't bubble after 10 minutes, your yeast might be dead. Start fresh with a new package. This step is non-negotiable for light, airy pita bread. Once bubbly, stir in 1 tsp salt and 1 tbsp olive oil to the yeast mixture.
Mix and Knead the Dough
In a large mixing bowl, combine the 3 cups all-purpose flour and the yeast mixture. Stir with a wooden spoon until a shaggy dough forms. Here's the thing—don't overmix. You want to bring it together just enough to form a rough dough ball, but keep some dry flour on the sides.
Turn the dough out onto a lightly floured surface and knead for 5-7 minutes until smooth and elastic. You'll know it's ready when it springs back slowly when poked. If it feels sticky, add 1-2 tablespoons more flour as needed, but don't go overboard—too much flour makes for dense pita.
Let the Dough Rise Until Doubled
Place the dough in a lightly oiled bowl, cover with a damp kitchen towel, and let it rise in a warm place for 1-1.5 hours until it has doubled in size. I like to turn on my oven light to create a warm environment—this helps the yeast work its magic faster.
You're looking for the dough to puff up noticeably and feel light when pressed gently. If it doesn't rise well, your kitchen might be too cold. Try placing the bowl near a warm spot in your kitchen or use a proofing box if you have one. Patience here pays off with perfectly fluffy pita!
Shape and Prepare for Air Frying
Punch down the risen dough and divide it into 4 equal pieces. Roll each piece into a ball, then flatten into a 6-inch round on a floured surface. Dust the top with 2 tbsp semolina flour—this prevents sticking and gives that beautiful golden crust. Cover with a towel while you prepare the air fryer.
Preheat your air fryer to 375°F for 3 minutes. This quick preheating ensures even cooking and that perfect crispy exterior. Place one pita round in the air fryer basket, seam-side up. Air fry for 3-4 minutes until puffed and golden brown with crispy edges.
Finish with Olive Oil for Extra Crispiness
While the pita is still hot, brush the top generously with olive oil using a pastry brush. This step is what transforms good pita into extraordinary pita—it adds that irresistible crispiness and rich flavor. Flip each pita and air fry for another 1-2 minutes if needed to ensure both sides are golden and crispy.
Remove from the air fryer and let cool for 1-2 minutes before serving. The pita should be soft and pliable inside with a satisfying crunch on the outside. Store any leftovers in an airtight container—they'll stay fresh for 2-3 days or freeze for up to 1 month.
Pro Tips For Making Air Fryer Pita Bread
- Preheat Like It’s 200°F: Your air fryer’s max heat isn’t the place to start—lock in 200°F for 3 minutes first. I learned this after my first batch came out uneven; the crust puffed in spots while others stayed doughy. The preheat step guarantees consistent browning, especially if you’re using a budget model that heats unevenly.
- Dissolve That Yeast: Mix the yeast with the warm water and sugar first, then let it sit for 5 minutes until frothy. Skipping this step means your dough will rise slower or unevenly—trust me, I’ve seen it. The sugar here isn’t just for flavor; it’s the yeast’s wake-up call.
- Roll to ⅛-Inch Thickness: Use a rolling pin to flatten the dough to exactly ⅛-inch thickness, no thicker. I used to eyeball it and ended up with dense, chewy pitas that didn’t crisp properly. The air fryer needs that even surface to get the perfect puff and crunch.
- Poke Holes Before Air Frying: Pierce each pita with a fork 4-5 times before cooking—this prevents steam buildup and guarantees a crispy exterior. I was skeptical until I tried it; now I can’t imagine skipping this step. The holes also let you stuff them easier later.
Flavor customization for this recipe
Spiced Olive Oil Twist
Transform your pita into a flavor sensation by brushing it with spiced olive oil after air frying. Mix 1 tbsp olive oil with ½ tsp smoked paprika, ¼ tsp garlic powder, and a pinch of cayenne pepper.
The smoky, slightly spicy finish pairs perfectly with grilled meats or creamy dips. I love this for a Mediterranean-inspired meal—it’s simple but makes a big difference. 🌶️
Herb-Infused Dough
Add fresh herbs directly to the dough for an aromatic twist. After mixing the yeast, stir in 1 tbsp finely chopped fresh rosemary or thyme along with the salt and olive oil. The herbs infuse the dough, creating a fragrant pita that’s perfect for stuffing with lamb or chicken.
For a stronger flavor, use 2 tbsp dried herbs instead. This works especially well with hummus or tzatziki. ✨
Garlic and Parmesan Finish
For a savory kick, brush the warm pita with a mix of 1 tbsp melted butter, 1 tsp minced garlic, and 1 tbsp grated Parmesan cheese. The garlic adds a bold punch, while the Parmesan gives a salty, umami depth.
This combo is a game-changer for breakfast wraps or as a side with roasted vegetables. I often double the garlic for extra zing—just be warned, it’s addictive. 🧄
Sweet and Savory Glaze
Drizzle your pita with a honey-mustard glaze for a sweet-savory balance. Mix 1 tbsp honey with 1 tsp Dijon mustard and brush it on while the pita is still warm. The sticky glaze caramelizes slightly, adding a gourmet touch.
This works beautifully with spicy dips like harissa or as a dessert wrap with Nutella and banana slices. Trust me, it’s a crowd-pleaser. 🍯
Everything Bagel Seasoning
For a fun, crunchy twist, sprinkle everything bagel seasoning on the dough before air frying. The mix of sesame seeds, poppy seeds, garlic, onion, and salt gives your pita a savory, textured bite. Brush with olive oil after air frying to lock in the flavors.
It’s perfect for breakfast sandwiches or as a snack with cream cheese. This is a great way to repurpose leftover pita too! 🌟
Lemon-Zest Brightness
Finish your pita with a burst of citrus by brushing it with 1 tbsp olive oil mixed with 1 tsp lemon zest. The bright, zesty flavor cuts through rich fillings like falafel or grilled chicken.
For extra freshness, add a few drops of lemon juice and a pinch of salt. This is my go-to for a lighter, refreshing pita that feels like a vacation in every bite. 🍋
Nutrition facts
Frequently asked questions about air fryer pita bread
Why does my air fryer pita turn out dense instead of puffy? This usually happens when the dough isn't properly kneaded or hasn't risen enough.
Can I make pita bread in the air fryer without semolina flour?
Yes! While semolina gives that signature crispy texture, you can substitute with 2 tbsp all-purpose flour or cornmeal. Just dust the rounds generously and brush with extra olive oil after air frying. The texture won't be identical, but it'll still be delicious. For best results, use 1 tbsp vital wheat gluten mixed with your flour to improve elasticity.
How do I reheat leftover air fryer pita?
Reheat in the air fryer for 1-2 minutes at 375°F until crispy again. For extra crispiness, brush with a little olive oil before reheating. You can also warm in a dry skillet over medium heat for 30 seconds per side. Never microwave—it makes pita soggy. Store leftovers in an airtight container for up to 2 days.
What's the best way to use air fryer pita?
These crispy flatbreads are perfect for stuffing with grilled chicken, falafel, or veggie fillings. Try them as wraps for sandwiches, or serve with Mediterranean dips like hummus, tzatziki, or baba ganoush. For a sweet treat, toast and spread with Nutella or honey. The pockets hold fillings beautifully, making them ideal for meal prep or quick lunches.
Can I make air fryer pita without yeast?
Not with this recipe—yeast is essential for that light, airy texture. However, you could try a flatbread variation using baking powder instead. Replace the yeast with 1 tsp baking powder and reduce the rise time to 10 minutes. The result will be more like a crispy flatbread than traditional pita, but still delicious. For best results, stick with the yeast version for authentic pita.