
Desserts
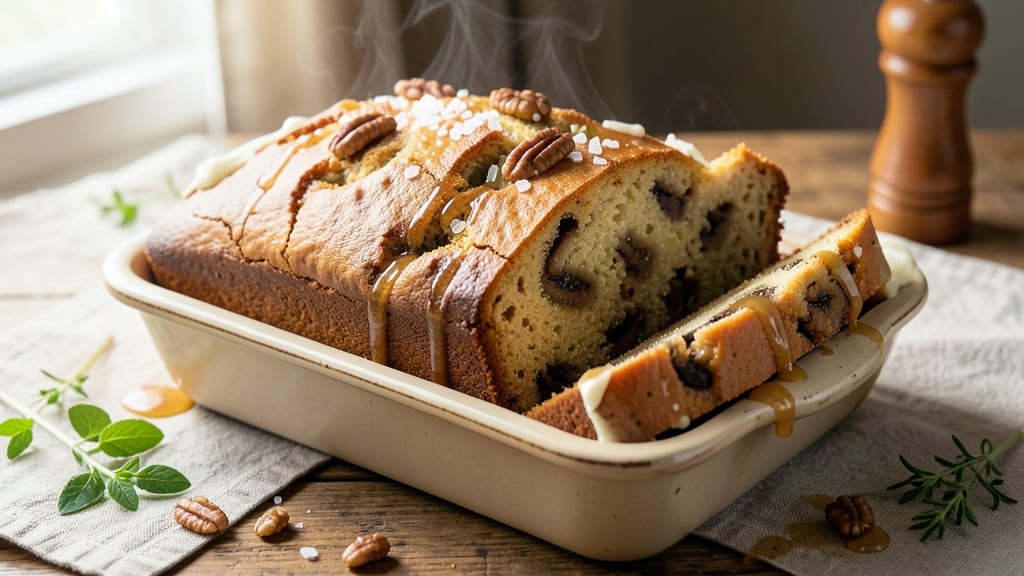
This 5-star moist banana bread recipe delivers the perfect balance of tender crumb, rich walnut crunch, and vanilla-infused sweetness that keeps slices moist for days. The secret lies in precise ingredient ratios and a gentle baking approach that locks in moisture without drying out the loaf.
I’ve perfected this recipe through countless batches, ensuring every slice stays soft and flavorful—no more sad, dense banana bread here.
What sets this apart is the vanilla infusion that elevates the classic banana flavor, while the walnuts add a satisfying texture contrast. The recipe uses ripe bananas (the riper, the better) and a touch of sour cream to guarantee that signature moistness.
No more dry, crumbly loaves—just a tender, golden-brown bread with a crackly top that begs for another slice.
The baking process is straightforward but critical: a low oven temperature and a water bath ensure even cooking and maximum moisture retention. The result? A loaf so tender it practically melts in your mouth, with a subtle caramelized edge that adds depth.
This isn’t just banana bread—it’s a foolproof, restaurant-quality dessert that’s easy enough for beginners but impressive enough for guests.
Ready to bake? The recipe scales perfectly for gifts or meal prep, and leftovers stay fresh for days when stored properly. Let’s get started—your taste buds (and your kitchen) will thank you.
Ingredients for 5 star moist banana bread
This recipe delivers restaurant-quality moistness with precise ratios and texture-boosting ingredients.
| Ingredient | Amount | Notes |
|---|---|---|
| Ripe Bananas 🍌 | 3 medium | Overripe with brown spots |
| All-Purpose Flour 🌾 | 2 ½ cups | Sifted for light texture |
| Granulated Sugar 🍚 | 1 cup | White or light brown |
| Light Brown Sugar 🍚 | ½ cup | Packed firmly |
| Unsalted Butter 🧈 | ¾ cup | Room temperature, not melted |
| Sour Cream 🥛 | ½ cup | Full-fat for moisture |
| Large Eggs 🥚 | 2 whole | Room temperature |
| Pure Vanilla Extract 🌸 | 2 tsp | Bottled vanilla preferred |
| Baking Soda 🧂 | 1 tsp | Freshly measured |
| Ground Cinnamon 🌿 | 1 ½ tsp | Freshly ground preferred |
| Salt 🧂 | ½ tsp | Fine sea salt |
| Walnuts 🥜 | 1 ½ cups | Chopped, toasted lightly |
| Water 💧 | ¼ cup | For water bath |
The bananas are the foundation—choose ones with dark brown spots for maximum sweetness and moisture. Trader Joe's or local farmers markets often have the ripest selection. For the walnuts, toast them lightly in a dry pan until fragrant—this deepens their flavor and prevents bitterness. The butter should be soft but not melted, ensuring it blends smoothly without creating steam in the batter. Sifting the flour removes lumps and creates a lighter crumb, while the sour cream adds that signature moistness that keeps slices tender for days.
No ripe bananas? Substitute with 1 cup unsweetened applesauce for moisture, but expect a slightly denser texture. Swap walnuts for pecans or almonds if preferred, though walnuts provide the best texture contrast. For a dairy-free option, replace the butter and sour cream with vegan butter and coconut yogurt. The vanilla extract is non-negotiable—imitation extracts lack the depth of flavor. If you're short on time, vanilla sugar can be used at half the amount, but pure extract delivers superior flavor. The baking soda and cinnamon should be freshly purchased for optimal leavening and aromatic impact.
This loaf stays fresh for 4-5 days when stored in an airtight container at room temperature, wrapped tightly in plastic. For longer storage, freeze slices individually for up to 3 months. The water bath is critical—it creates a steam environment that locks in moisture during baking. If you're making this ahead for gifts, bake it 1 day in advance to allow flavors to meld fully. The bread reheats beautifully in a 350°F oven for 5-10 minutes to restore its warm, inviting texture.
Why You'll Love This Recipe
- No Mixer Needed: The only "chopping" you’ll do is smashing those ripe bananas with a fork—no food processor, no stand mixer. Honestly, I’ve made this with one hand while holding my coffee.
- Caramel-Kissed Moisture: That light brown sugar and butter combo? It’s what turns this into something dangerously addictive—soft, tender crumb with just enough chewy bite. (Yes, even on a Tuesday night.)
- Breakfast or Snack: Slice it fresh for a quick breakfast with peanut butter or wrap it in a tortilla for a lunchbox hit. My kids ask for it more than cereal—no joke.
- Leftovers That Last: This stays fresh for days (if it lasts that long) and freezes beautifully. I double the batch on Sundays so I’m not scrambling midweek—saves me time and money.
Step-by-step instructions for walnut-studded banana bread
Mastering this recipe delivers a perfectly moist crumb with walnut studs that add satisfying texture.
Prep Ingredients and Preheat
Begin by preheating your oven to 350°F and placing a rack in the lower third position. This ensures even baking and prevents a dry top crust. While the oven heats, prepare all ingredients according to the list—especially the ripe bananas, which should be spotted and mashable. I like to use a potato masher for this step to avoid overmixing and maintain a rustic texture.
Toast the 1.5 cups walnuts in a dry skillet over medium heat for 3-4 minutes until fragrant and lightly golden. Watch them closely—they burn quickly. Let them cool completely before chopping into rough pieces. This toasting enhances their nutty flavor and prevents them from releasing moisture into the batter during baking.
Mix Wet Ingredients for Maximum Moisture
In a large mixing bowl, combine the 3 medium ripe bananas, 0.75 cup unsalted butter, 0.5 cup sour cream, 1 cup granulated sugar, and 0.5 cup light brown sugar. Mash the bananas thoroughly until smooth, then beat the mixture with an electric mixer on medium speed for 2-3 minutes until fully emulsified and pale. The butter should be incorporated completely, creating a thick, ribbon-like consistency.
Add the 2 whole large eggs, one at a time, beating well after each addition. Then stir in the 2 tsp pure vanilla extract. This step is crucial for developing the bread's signature moisture and tenderness. The sour cream adds richness while preventing a dense crumb, and the eggs provide structure without drying out the texture.
Combine Dry Ingredients and Fold Gently
In a separate bowl, whisk together the 2.5 cups all-purpose flour, 1 tsp baking soda, 1.5 tsp ground cinnamon, and 0.5 tsp salt. Sift the dry ingredients directly into the wet mixture and fold together using a spatula, being careful not to overmix. The batter should be thick but pourable. Gently fold in the toasted, chopped walnuts until evenly distributed throughout.
Here's the thing—banana bread's moisture comes from proper technique. Overmixing develops gluten, which leads to a tough crumb. Instead, use a gentle folding motion to combine just until the flour disappears. The walnuts should be dispersed evenly, with no clumps at the bottom of the bowl.
Prepare the Loaf Pan and Bake
Grease a standard 9x5-inch loaf pan thoroughly with butter or nonstick spray, then line the bottom with parchment paper for easy removal. Pour the batter into the prepared pan and smooth the top with a spatula. Tap the pan gently on the counter to release any air bubbles trapped in the batter. This ensures an even rise and prevents a dense texture.
Place the pan in a deep baking dish and carefully pour the 0.25 cup water into the bottom of the dish. This creates a water bath that helps steam the bread during baking, which is key to achieving that signature moist texture. Bake for 50-60 minutes until a toothpick inserted in the center comes out clean with just a few moist crumbs clinging to it.
Test for Doneness and Rest
Remove the bread from the oven and let it cool in the pan for 10 minutes. Then transfer it to a wire rack to cool completely before slicing. This resting period is critical—it allows the internal structure to set properly, preventing a gummy texture. The bread should have a golden-brown top with a slightly domed center, indicating proper baking.
For best results, slice the bread when it's at room temperature. Each serving should reveal a moist, tender crumb with evenly distributed walnuts and no dry spots. The vanilla infusion should be noticeable in every bite, complementing the natural sweetness of the ripe bananas. Store any leftovers in an airtight container at room temperature for up to 3 days or refrigerate for up to 1 week.
Pro Tips For Making 5 Star Moist Banana Bread
- Mash Bananas Thoroughly: I learned this the hard way—when bananas have lumps, your bread turns out dense and uneven. Use a fork first, then press through a fine-mesh sieve to remove skins and fiber. No sieve? A potato masher works, but strain it afterward.
- Mix Dry Ingredients First: Save yourself from gluten overdevelopment by combining flour, baking soda, and salt before adding wet ingredients. This keeps the texture tender, especially when using ripe bananas, which already add moisture.
- Don’t Overmix the Batter: After folding in the mashed bananas, stop mixing as soon as the flour is just incorporated. Overworking it introduces air, which leads to a tough crumb. A few streaks of flour are fine—perfection isn’t the goal here.
- Sweeten the Topping: Drizzle the brown sugar-butter topping immediately after baking, while the bread is still warm. The residual heat melts the sugar faster, creating a sticky, caramelized crust. Skip this, and you’ll end up with a dry, crumbly top.
Make-ahead tips for 5 star moist banana bread
Pre-Bake Prep
Make this recipe ahead of time for maximum flavor development. I recommend baking the loaf 1 day in advance—this allows the vanilla and cinnamon flavors to fully meld, resulting in deeper, more complex notes.
The bread will also be easier to slice after resting overnight. Store it in an airtight container at room temperature, wrapped tightly in plastic wrap or foil. 💫
Freezing for Later
For long-term storage, freeze the fully cooled loaf in slices rather than whole. Wrap individual slices tightly in plastic wrap, then place them in a freezer-safe bag with all air removed. This prevents freezer burn and makes it easy to grab just one serving.
Frozen slices maintain their moisture and texture for up to 3 months. Thaw at room temperature for 1-2 hours before serving.
Reheating Perfection
Revive stale slices with a quick reheat in the oven. Preheat to 350°F, wrap the slice in foil, and warm for 5-7 minutes. For extra moisture, drizzle with 1 tsp milk or orange juice before reheating.
Microwave reheating works too—cover with a damp paper towel and heat for 20-30 seconds on 50% power. The goal is to restore warmth without drying out the crumb.
Gift-Worthy Packaging
When giving this bread as a gift, slice it while still warm and wrap each piece in parchment paper. Place the slices in a cellophane bag tied with twine, then add a ribbon and tag.
For extra presentation, dust the top with powdered sugar or sprinkle with crushed walnuts. The warm, fragrant aroma makes it feel like a homemade treat straight from a bakery. 🎁
Make-Ahead Muffins
Divide the batter among greased muffin tins (fills about 12 standard-size muffins) and bake with the same water bath method. These stay fresh for 3 days at room temperature or 1 month in the freezer.
Reheat individual muffins in the microwave for 10-15 seconds. The smaller portions make them perfect for grab-and-go breakfasts or picnic treats.
Batch Prep Tips
Double the recipe for larger gatherings—just increase all ingredients by 50% and use a 9x13-inch pan instead of a loaf pan. For even easier prep, mix the dry ingredients in advance and store in an airtight container for up to 1 week.
The wet ingredients can be prepped 1 day ahead and stored in the fridge. When ready to bake, simply combine and proceed with the recipe. This cuts active prep time to just 10 minutes. ✨
Nutrition facts
Frequently asked questions
Why does your recipe use sour cream instead of yogurt?
Sour cream delivers richer moisture and a lighter texture than yogurt. The fat content in sour cream creates a tender crumb while preventing dryness, which is key for that signature 5-star moistness. Plus, it adds subtle tang that balances the sweetness of ripe bananas. For a dairy-free option, coconut yogurt works but may slightly alter the texture.
Can I substitute walnuts with another nut or seed?
Try pecans, almonds, or even sunflower seeds for a different texture. Pecans add buttery richness, while almonds provide a slightly crunchier bite. For seeds, toast them first to enhance flavor. Just note that walnuts give the best balance of crunch and flavor in this recipe.
How do I know when my banana bread is fully baked?
Use the toothpick test: insert it into the center—it should come out with just a few moist crumbs (not wet batter). The top should be golden brown with a slight crack, and the edges should pull away from the pan. Overbaking dries out the bread, so remove it when it's just slightly underdone—it'll firm up as it cools.
What's the secret to keeping banana bread moist for days?
The water bath during baking creates steam that locks in moisture, while the sour cream and butter add fat that prevents drying. Store it in an airtight container at room temperature (not the fridge) to maintain freshness. For extra moisture, brush slices with simple syrup (equal parts sugar and water) before serving.
Can I make this gluten-free or without eggs?
Yes! For gluten-free, replace flour with a 1:1 gluten-free baking blend (like Bob's Red Mill). For egg-free, use 2 tbsp ground flaxseed + 6 tbsp water per egg (let sit 5 minutes to thicken). Note that texture may vary slightly—these substitutions work best when combined with the water bath technique for moisture retention.